Search Knowledge Base by Keyword
Here’s a step-by-step guide to installing the Easy Updates Manager plugin – whether you want the free version or the premium features.
Installing Easy Updates Manager free
To install the free version of the Easy Updates Manager plugin:
1. Log in to your WordPress site as the administrator.
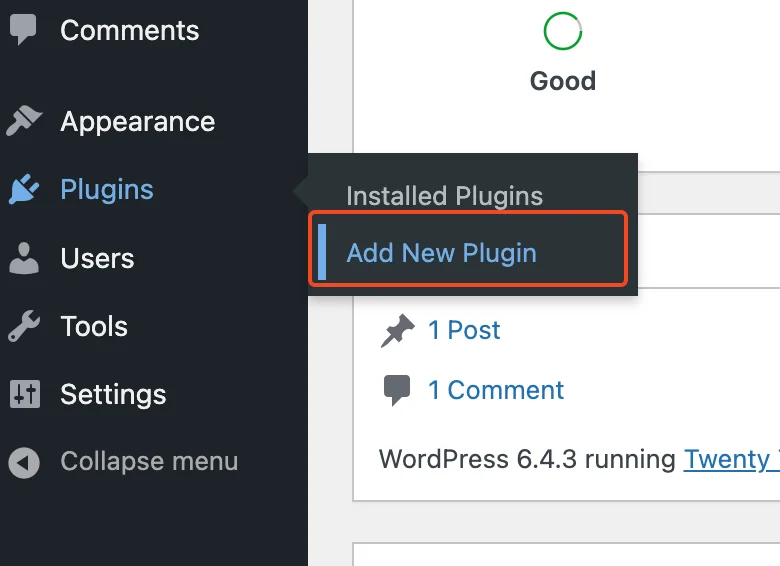
2. Go to the Plugins section on the left-hand menu and select Add New Plugin.
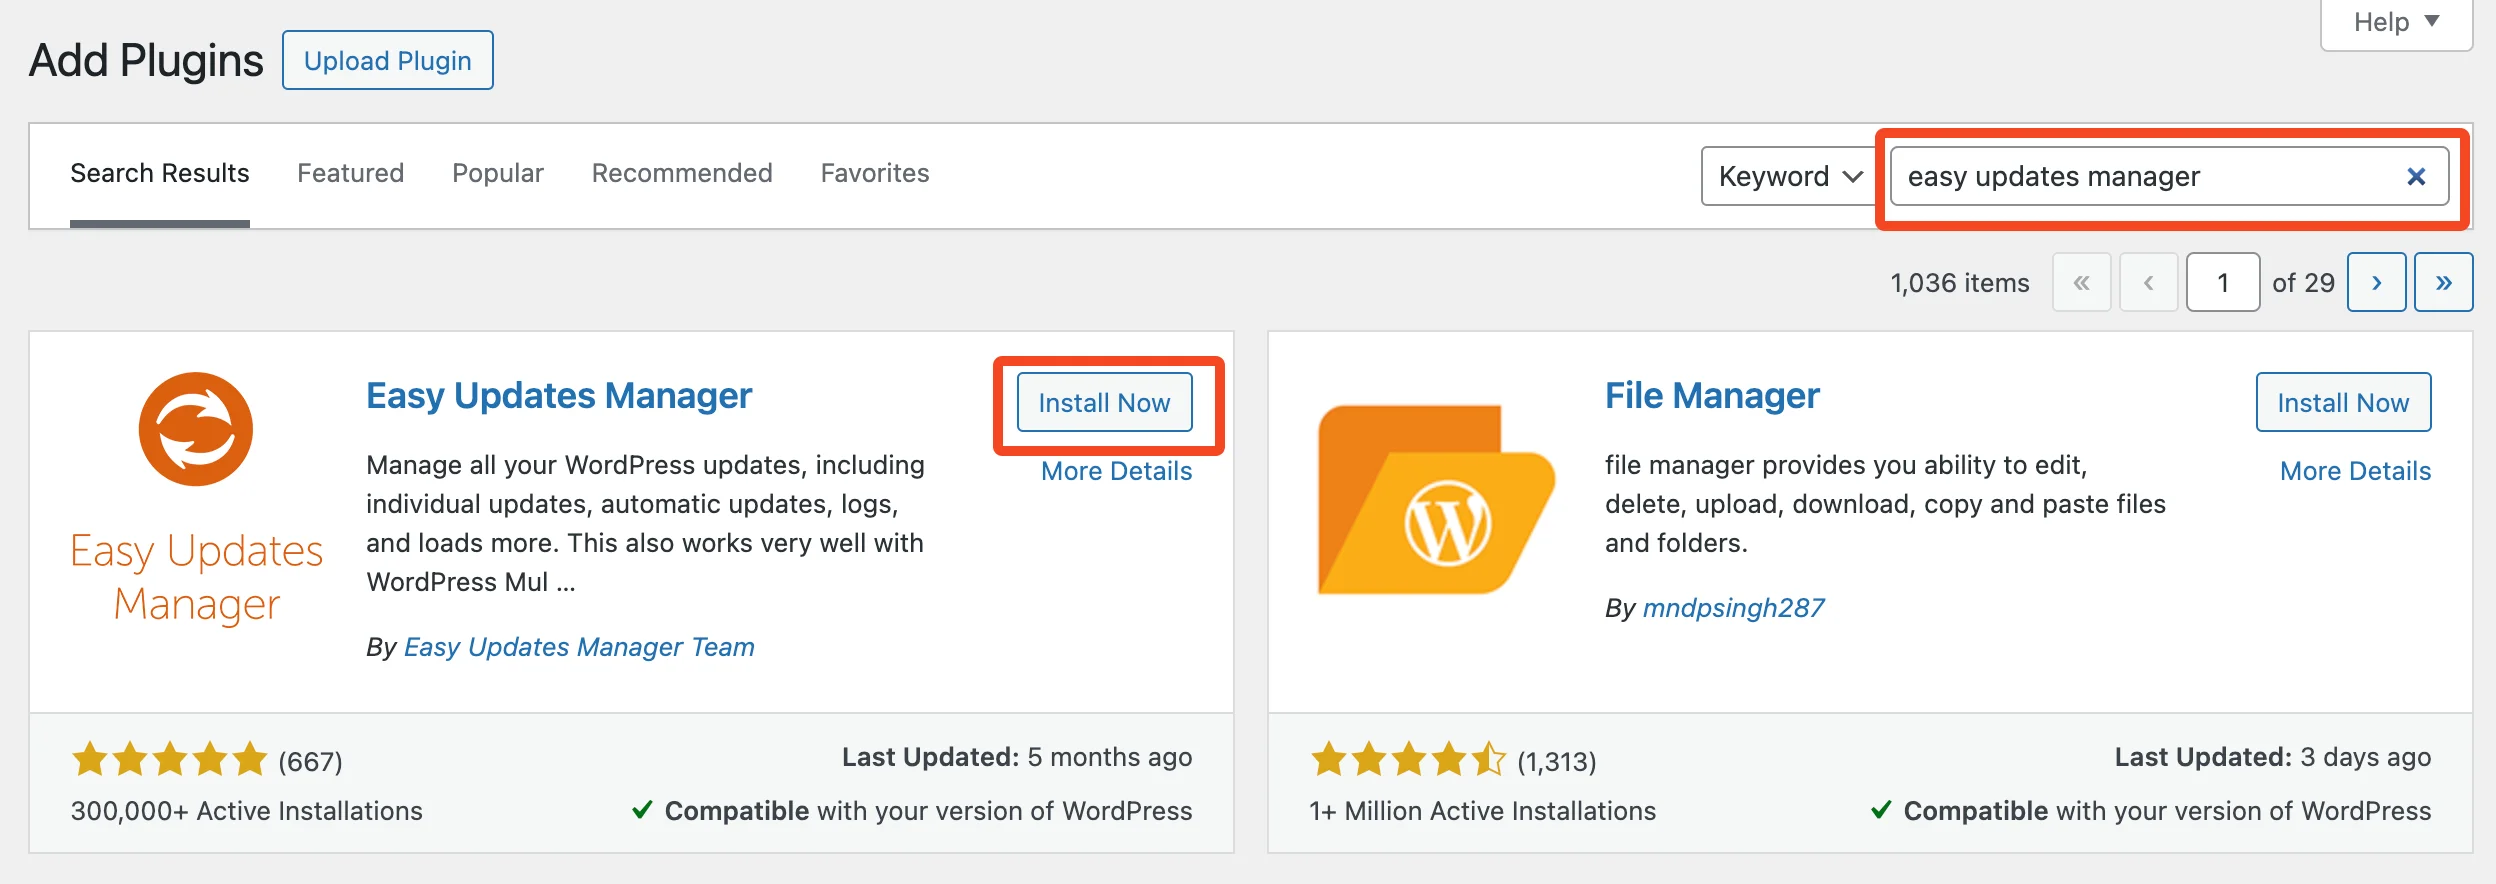
3. Use the search bar located at the top right corner and enter ‘easy updates manager.’
4. Identify the Easy Updates Manager plugin from the search results and click on Install Now.
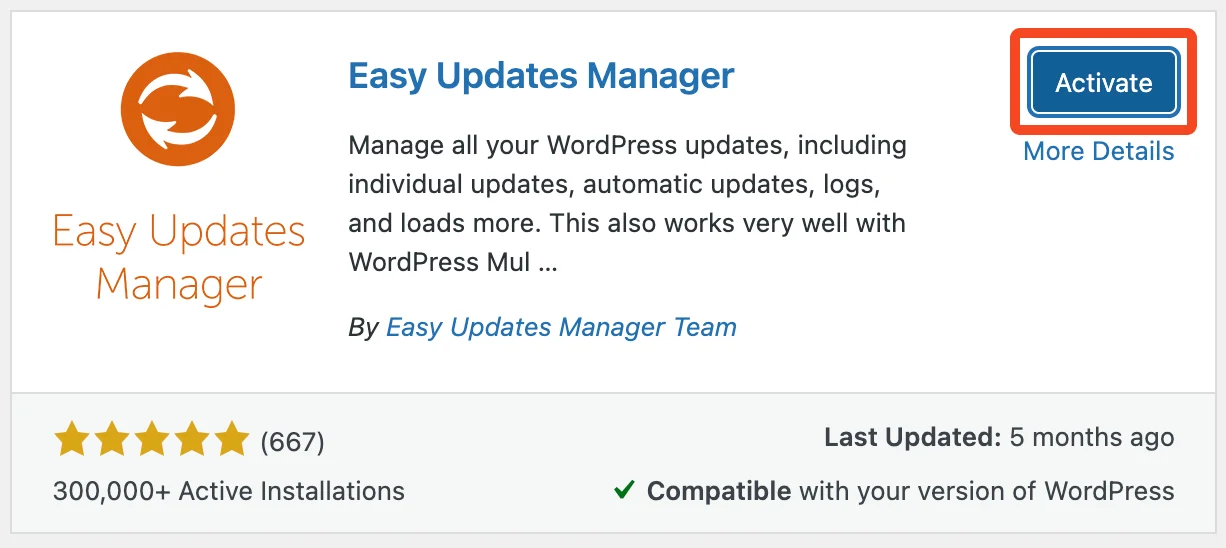
5. After the installation process is complete, click on the Activate button to enable the plugin.
The Easy Updates Manager plugin is now installed and operational on your site.
Installing Easy Updates Manager Premium
If you currently have the free version of Easy Updates Manager installed on your website, rest assured it will be automatically deactivated.
Also, there’s no requirement to install the free version prior to installing Easy Updates Manager Premium.
Here’s how to download and install Easy Updates Manager Premium on your site:
1. Visit our website to purchase the Easy Updates Manager Premium plugin.
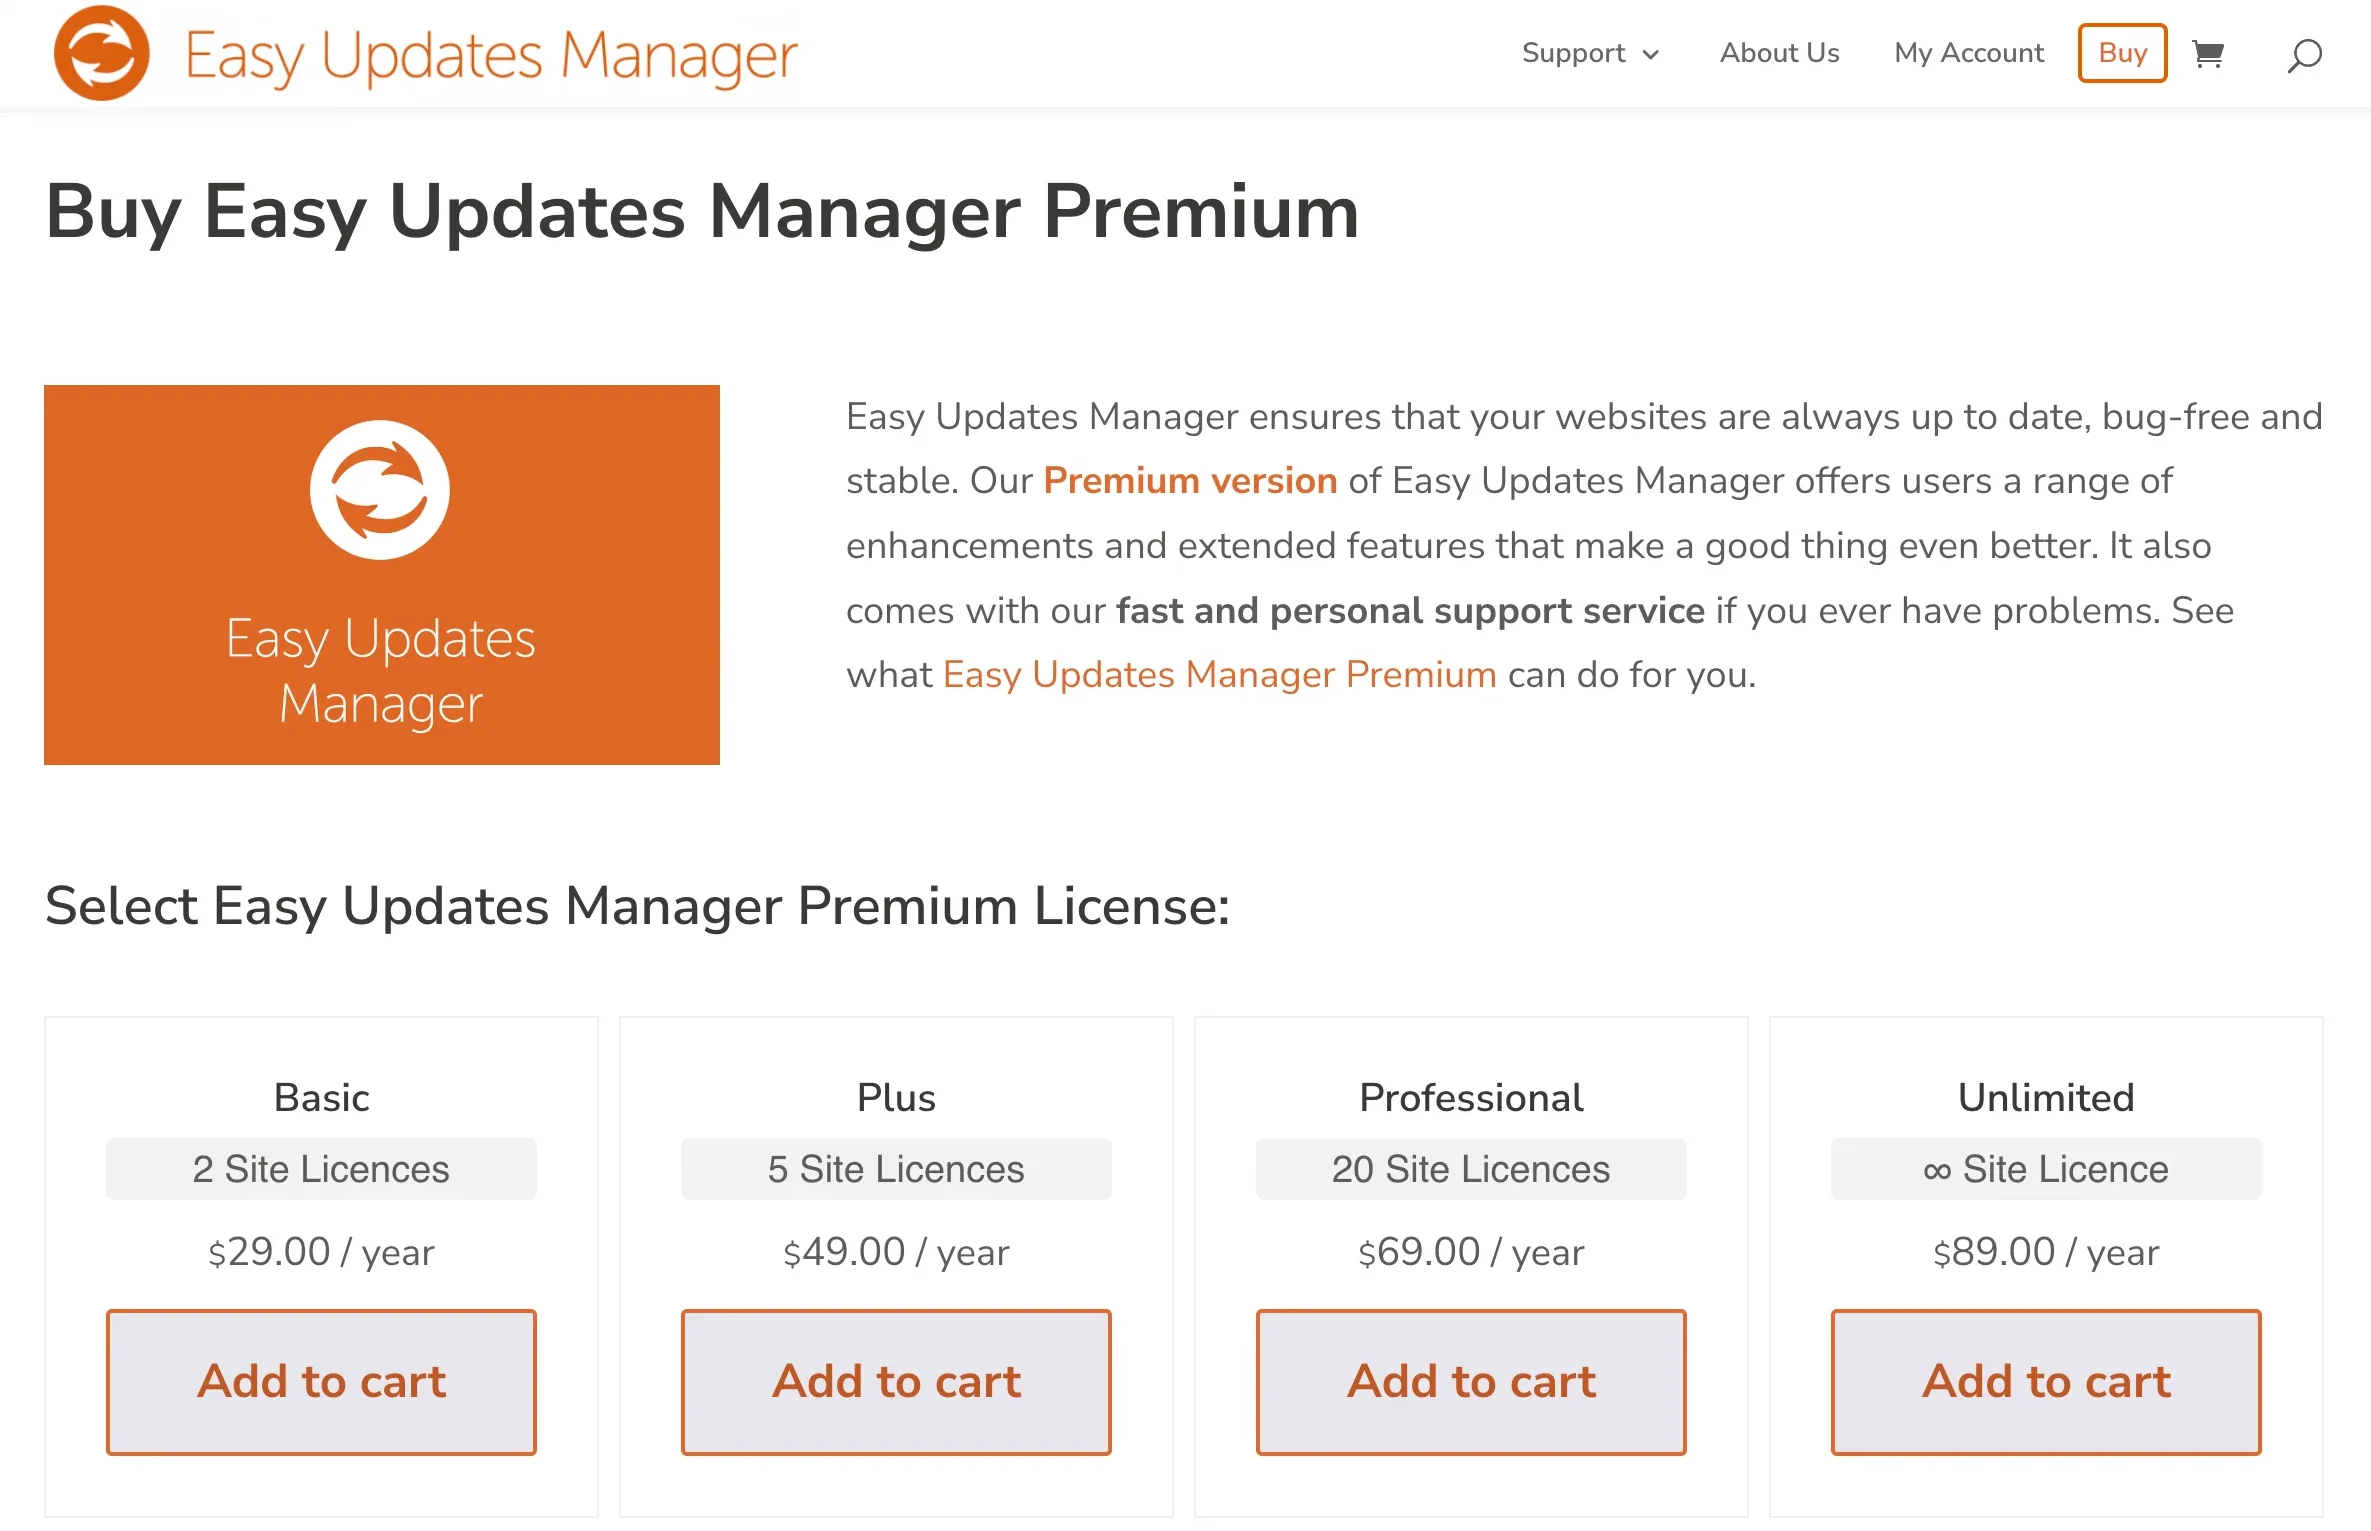
2. Download Easy Updates Manager Premium from the link in your confirmation email or from your My Account page on our website.
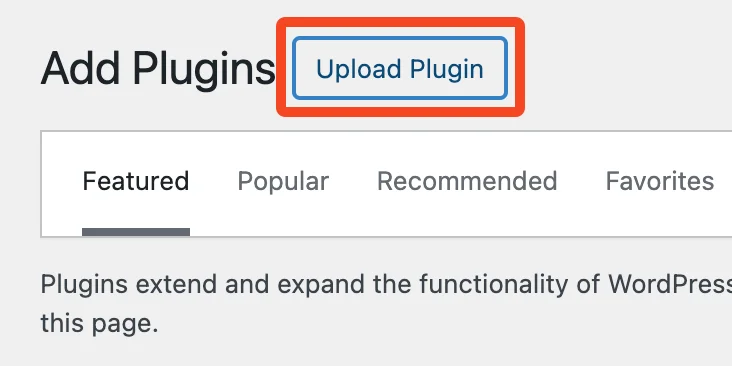
3. Log in to your WP admin dashboard and navigate to Plugins > Add New Plugin.
4. Click on the Upload Plugin button located near the title at the top of the page.
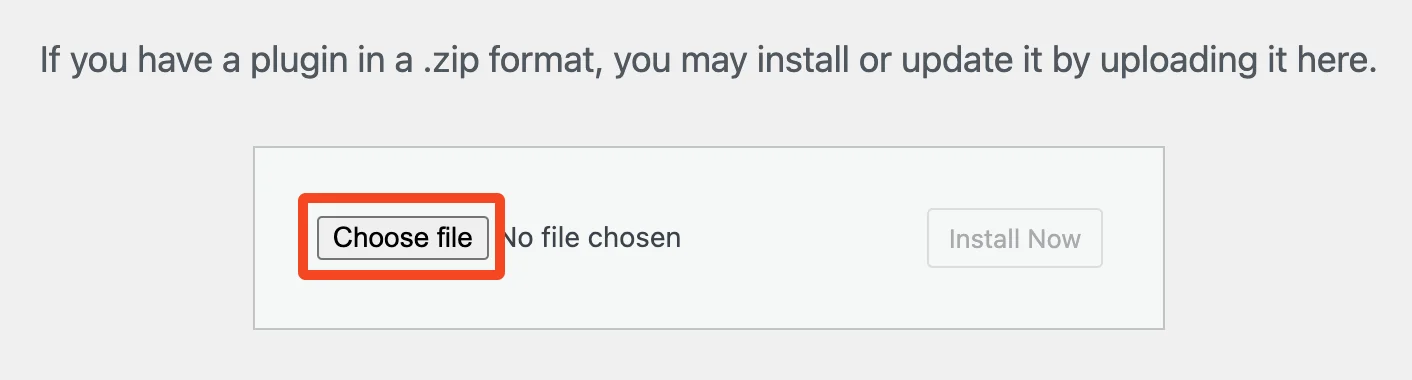
5. Click on the Choose file button to select the Easy Updates Manager Premium plugin file that you downloaded.
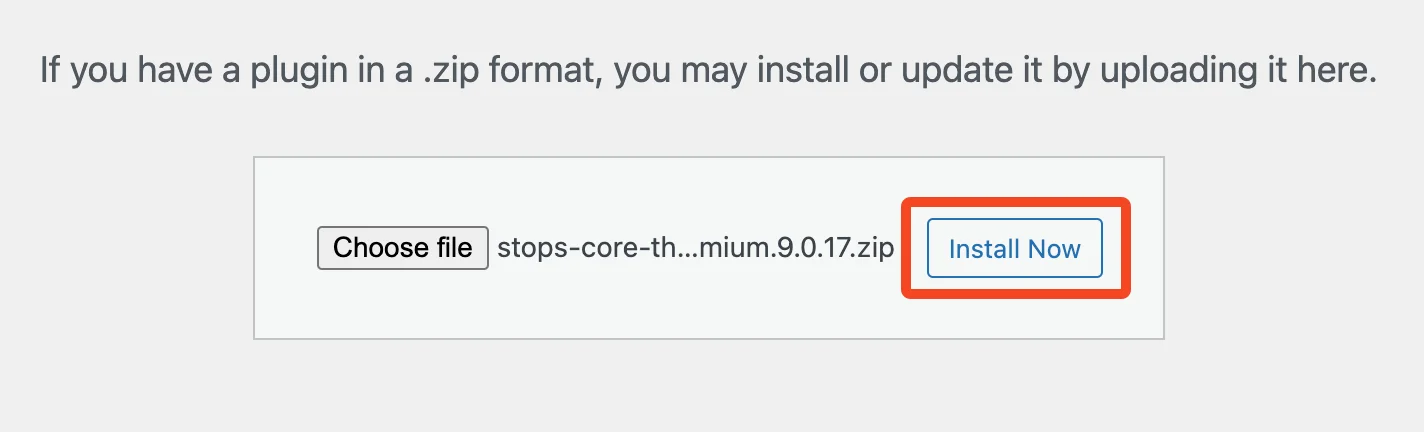
6. Install the plugin by clicking on the Install Now button.
7. Activate Easy Updates Manager Premium by clicking on Activate Plugin.
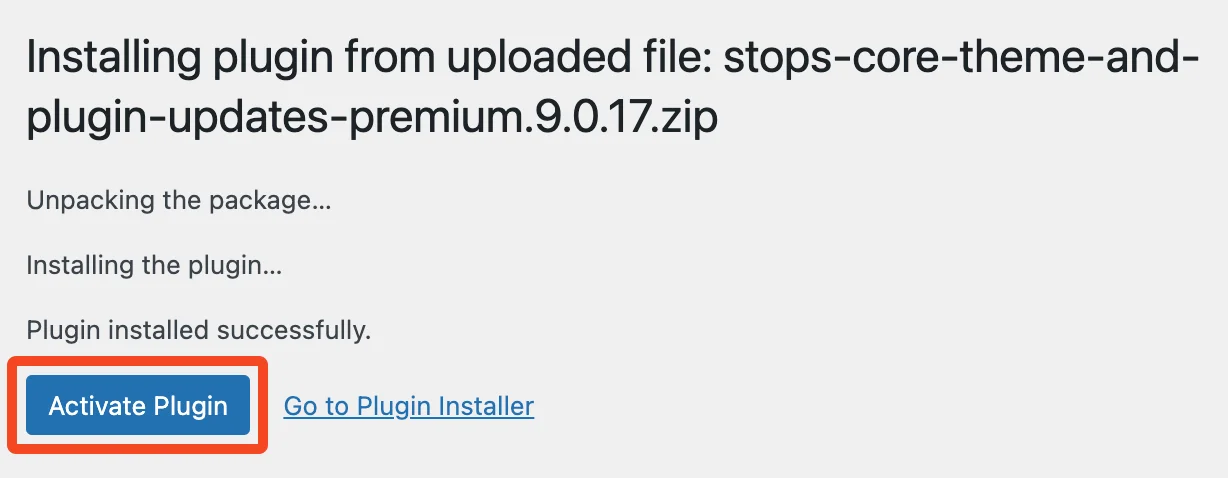
You have successfully installed and activated Easy Updates Manager Premium on your website!
Note: You’ll be prompted to enter your Easy Updates Manager email and password to link your site to licences. This step is necessary to verify your purchase and enable the plugin to receive automatic updates. Enter the required details and click Connect.

Want to learn more?
For instant answers, take a look through our information-packed frequently asked questions page.
Didn’t find an answer in the FAQs? We have a free support forum in the WordPress directory.
If you are a premium customer, you can contact us via the Customer Support Form. Our team will try to get in touch with you within 24 hours (except Sundays).