WordPress shortcode – Why you should use it

Want to add dynamic content very easily into your WordPress posts, pages, and sidebars? Adding shortcode can be the easiest and most suitable way to do just that and has the additional benefit that you can put it pretty much anywhere in your WordPress site.

There is no better way to add reusable features on your WordPress website than shortcodes, as you can use the same shortcode in a variety of different places and still get exactly the same result. While there are a range of default shortcodes you can choose from, some WordPress plugins also allow you to add new shortcodes to them as an added feature. 

In this blog, we will try to tell you everything you need to know about WordPress shortcodes, what the how, how they work, how to use them and hope you will learn all you need to know about from this guide. Let’s get started!

What is a Shortcode?

Shortcode is a portmanteau of the words ‘shortcut and code’. 

It is typically a small piece of code that can be identified and indicated by square [ ] brackets and is a code that when inserted into any page or post, generates a predefined specific functionality. 

For example, if you want to add a gallery, the following code can be added to any page or post within your WordPress site.

This will output a gallery with your site’s image IDs referenced within the code. As per the code, the gallery will have 4 columns and their max size will be ‘medium’ (as defined by WordPress).There are many more small shortcodes like this available in WordPress for outputting   different features and functionalities. Below, we will go through the different types of WordPress shortcode you can use on your WordPress site.

Types of shortcodes

WordPress offers two types of shortcode –

Self-closing shortcodes: These do not require a closing tag. For example, the gallery shortcode –

– does not need a closing tag.

Enclosing shortcodes: These types of shortcode do require closing tags. For example, the caption shortcode – 

–  is used to wrap captions around the contents.

Default WordPress shortcodes

Below are 6 default shortcodes offered by WordPress:

  • Audio: Embeds audio files and enables playback on your website. 
  • Caption: Helps to wrap captions around content. 
  • Embed: Allows you to set a maximum level for embedded items as well as set different attributes in your embeds.
  • Gallery: Adds a customizable image gallery to your site. You can use the features to customize what the gallery looks like or determine which image is used.
  • Playlist: You can create audio or video playlists with these self-enclosing shortcodes.
  • Video: Allows you to embed a video file and play it back. With this shortcode, you can embed videos in formats like MP4, WebM, M4V, OGV, WMV and Flv.

In addition to these default shortcodes, many WordPress plugins will offer custom shortcodes that you can use in the same way. 

How to use shortcodes in WordPress

Using shortcodes in WordPress should be a simple and straightforward process, although it does depend on where you want to add the shortcodes on your site. 

Using WordPress shortcodes in Pages and Posts

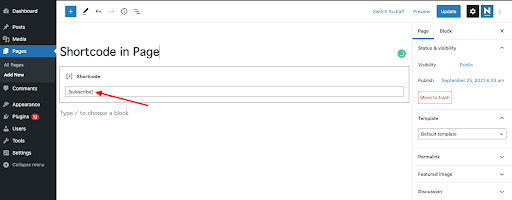
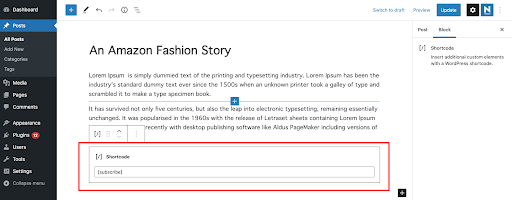
First, navigate to the respective page/post you want to add the shortcodes to and then access the editor. Now you need to click the add block button to add a shortcode block.

If you are using the Gutenberg editor, you can easily add shortcode tags to the shortcode block. After adding the shortcode block, simply paste your shortcode in the text box and you’re done. The functionality of the shortcode should now be visible on the published page.

Insert shortcodes in WordPress widgets

Inserting shortcodes into a WordPress widget should also be fairly straightforward and easy to do. The latest release of WordPress 5.8 comes with the Gutenberg Block based widget area built in, so now you can add & customize Gutenberg blocks in your widgets.

To start, go to Appearance>Widgets in your WordPress Dashboard. Here, you’ll find all the pre-made widgets based on your theme. Select the widget in which you want to add your shortcode and then find the Gutenberg shortcode block. Insert the shortcode into the block and click the ‘Save’ button once complete.

The task is now complete. You can now visit the respective page to see your shortcode in action.

Add a shortcode in WordPress theme files

We’ve already seen how shortcodes can be used inside WordPress posts/pages and widgets. WordPress made it simple to also add a shortcode inside a theme file as well. You can add the shortcode to any WordPress theme template following the below format.

How to create a custom shortcode in WordPressJust replace the your_shortcode with the shortcut of your choice and you should find it works exactly as intended. 

Creating a custom shortcode is all about technical and coding knowledge. It is also helpful if you should also have a solid understanding of why you need to create a custom shortcode and where you want to use it.

To create a custom shortcode, first open the backend file directory of your website. Next, navigate to wp-content > themes > youractivetheme > function.php file. You can now enter the required function for the shortcode and save it for further use. 

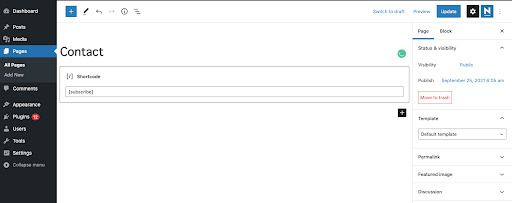
Below is an example in which you can see that we’ve created a custom shortcode in order to display our Twitter account on our WordPress website.

Next, we are going to add the shortcode to our website contact page using the Gutenberg Shortcode block.

Let’s see how this shortcode works in the front end.

Where to add your custom shortcode script

If you wish to add the custom shortcode to your theme file, they can be added to your theme’s functions.php file, or included in the plugin. If you decide to add them to the theme file, you can create a child theme and modify the code safe in the knowledge that you will have the original theme on hand, should you ever need to revert back.

If you are adding a new shortcode to a plugin on your WordPress site, it is recommended that you initialize it only once WordPress has finished completely loading. You can do this by wrapping the add_shortcode() function within another function by using a method called ‘the wrapper function’

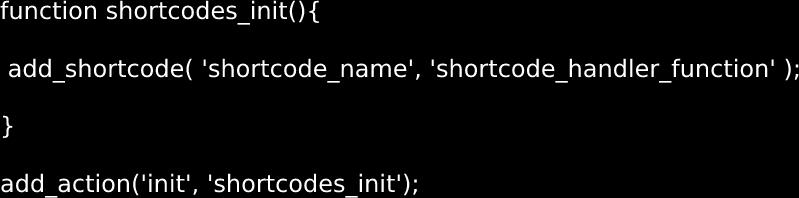
By using the add-action() function hooks, the  ‘shortcodes_init’ shortcode has been instructed to only initialize once your WordPress site has completely finished loading by using the init hook.

Shortcodes vs Gutenberg Blocks

The operation of shortcode is actually quite similar to Gutenberg blocks, with the latter offering diverse customization options. Since Gutenberg’s arrival, usage and popularity of shortcodes have slightly decreased, with many popular WordPress plugins now coming up with dedicated Gutenberg blocks instead of shortcodes.

While you can still add shortcodes inside a dedicated Gutenberg block, blocks alone can achieve the objective of shortcodes and can do so in a more optimized way. 

If you find shortcodes useful, you may prefer WordPress blocks, as blocks can allow you to do the same thing in a more user-friendly way. It also allows users to add dynamic content to posts/pages with a more intuitive user interface, that shortcode is unable to do.

However, this does spell the complete end of the traditional shortcode as there are still some uses that have not yet been replaced by blocks. As such, you are likely to see the use of shortcodes continue into the near future.

The benefits and disadvantages of using shortcode

Benefits

  • Shortcodes make it easy to add complex features to a WordPress site with a single line of code.
  • Normally shortcodes are easier to create and set-up than the traditional HTML code or PHP scripts.
  • Eliminates the need to write complex scripts by automating the development workflow whenever you want to insert a specific feature.
  • Shortcodes are easily customizable, so that users can modify how the same shortcode will work out by changing its attribute options.
  • Can be inserted inside Plugins, so even if you update WordPress or change your theme, the shortcodes will not be lost and will continue to work as before.

Disadvantages

  • Not intuitive: Using multiple shortcodes on a single page and then customizing them can be a struggle.
  • Theme dependent: As soon as you change your theme, shortcodes can sometimes stop working with your new theme.
  • Can break HTML: Due to interoperability issues or conflicting tags, problems can sometimes occur. As such, you will need to have a backup plugin in place if you want to use them on your site.
  • Extra server load: Additional shortcodes may add load to your server. It is natural that as the number of shortcodes on your page/post increases, so does the load, which can lead your website to decrease in speed.

WordPress Shortcode Common FAQs

There are some questions about WordPress shortcodes that people often ask. Below is a brief overview of the common questions and their answers, which we have not discussed before.

Do shortcodes slow down WordPress?

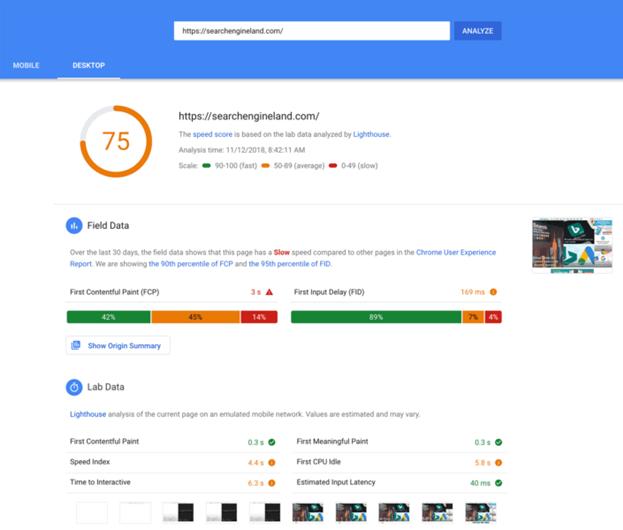
Site speed is a huge issue in WordPress and using a lot of shortcodes on a single page or a site can slow your website down. So it’s better to use shortcodes only when needed, especially now that you have the option of using Gutenberg blocks.

Where are WordPress shortcodes stored?

WordPress shortcodes are usually placed on posts or pages. However, now that the widget section of WordPress also supports Gutenberg block editing, it is possible to use shortcodes almost anywhere on the website.

Is the shortcode HTML?

Yes, the shortcodes are HTML-based codes that can be integrated into a WordPress website.

Are there any “bad” aspects when using shortcodes?

As discussed above, if you use shortcodes in your theme and decide to change the theme, that particular shortcode will stop working. Otherwise, shortcodes are universal and not dependent on any other factors.

Does WordPress have built-in shortcodes?

Yes, WordPress does offer some shortcodes by default. For example, a gallery that can be added via the shortcode API.

How do I add a shortcode image in WordPress?

Firstly, go to the Page or Post you wish to work in. Then select the page or blog post where you want to add the shortcode. Click the ‘Add Shortcode’ button on the next screen. Select your preferred shortcode in the “Insert shortcode pop-up” box. Now you can create a shortcode image by clicking “Text and Image shortcode”.

Remember to back up your WordPress site before working on the shortcodes

Backup is the first level of security for any WordPress site. Every piece of content, post, comment and piece of valuable data you have on your site can be lost in a single second.

If you have ever worked on a WordPress site in the past, you will know that you can lose all of your data and work for any number of reasons. For example, sometimes your website may just crash due to incompatible software. Or maybe your site has been attacked with malware and cyber hacking, traffic overload or has suffered hardware failures. Another reason you can lose your data is if your content or customization has conflict with the WordPress core files, resulting in your site going down. As shortcode plays with codes, there will always be a chance of something unexpected happening (possibly a conflict of code with WordPress core files) that might bring your site to a standstill.

It’s not always possible to prevent such unfortunate events. However, what you can do is to be prepared on how you can get your site back and up and working again, even if something terrible does happen. Our suggestion? Protect your site from this ever-present threat, by using a tool that you can use is the top-notch WordPress backup plugin – UpdraftPlus.

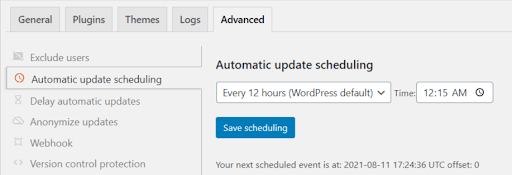
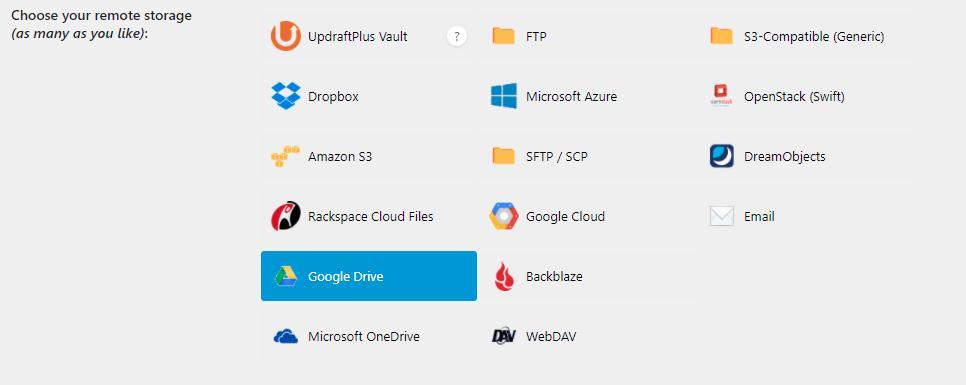
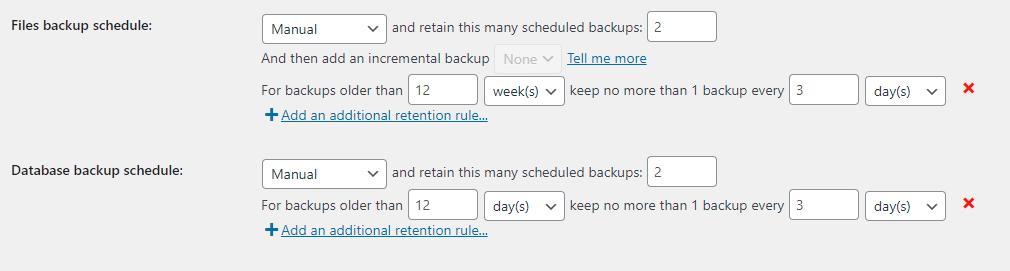
UpdraftPlus provides an easy-to-use interface that makes it very simple to backup your WordPress site. You can save your backups directly to online storage locations, such as Dropbox or Google Drive. With UpdraftPlus, you can set an automatic backup schedule so you don’t even have to remember to back up. Just install, set up, and you are good to go.

Conclusion 

Shortcodes in WordPress were first introduced back to WordPress 2.5. In addition to the themes and plugins, shortcodes make it easy to customize your WordPress site. By using shortcode, it’s easy to implement and reuse certain features over and over again without the need for coding. Apart from the default WordPress shortcodes, third-party plugins can also come with shortcodes to make your WordPress journey easier. 

We hope this guide has helped you learn and discover WordPress shortcodes and help you add shortcodes to your site.

If you have any questions regarding this article, pleaselet us know in the comment section below.

The post WordPress shortcode – Why you should use it appeared first on UpdraftPlus. UpdraftPlus – Backup, restore and migration plugin for WordPress.

How to create a staging site/clone for WordPress with UpdraftClone


‘Let’s make it live in the staging environment first.’ 

As a developer, you may have heard this a lot; and if not – trust me, you will hear this a lot going forward.

So, what exactly is a staging server?

If you want to add new functionality or change a specific behavior of an existing live website, you need to first test it on a staging server. It’s like a test environment – where you can experiment without any risks – If everything works fine, then you are free to make the same changes on your production server in the knowledge that it will not have any kind of negative impact on your live site.

A staging server is a test server used to test a website in a ‘production-similar’ environment. This server is a completely safe way to add/change flow for your website, as since it’s just a testing server, it doesn’t matter if it reports any errors or the site completely crashes due to the changes you made. You can figure out where you went wrong, fix the errors and create a stable version of your site.

By using UpdraftClone, you can create a clone of your WordPress website instantly and from within the UpdraftPlus settings. But before choosing UpdraftClone, we will explain briefly why all WordPress site developers and owners should pick this option.

Why Choose UpdraftClone?

To run a staging site, you will require a separate server. In order to do this, you will first need to buy a website hosting package. The charges of website hosting vary depending on the type of host environment you decide to go with. Usually there are 4 types of hosting – Shared hosting, dedicated hosting, VPS hosting and managed WordPress hosting.

Shared hosting: On shared hosting, multiple websites are hosted together on a single physical web-server. The server resources are then shared among all hosted websites.

Dedicated hosting: A physical web server that is dedicated to a single website.

VPS hosting: Virtual private server(VPS) hosting copy dedicated server environments within a shared server. This option is quite popular as it is cheaper than dedicated hosting and provides better performance, reliability and security than shared hosting.

Managed WordPress hosting: This option provides powerful technological options for your WordPress site. This hosting option takes care of the backups, security checks, updating WordPress and much more.

You can purchase any one of the above hosting services to set up a staging site. Once you have a hosting server, you would then need to set the same environment as your live site server. By doing this, it ensures your site will not have any problem once your changes on the staging server are moved to the live server.

Upon setting up your ideal staging server environment, you will have to perform the following steps which will set up the staging version of your site. This will require a fair degree of technical knowledge to achieve.

  • Download files and database from the production server.
  • Upload files and database on the staging server.
  • Run a search/replace in the database matching your staging URL. You will need to replace all occurrences of live URL with a staging URL.

Note: To simplify this migration process, you can use the UpdraftMigrator. This option enables this process in a matter of minutes and is completed within the UpdraftPlus settings.

Even if you only need the hosting server for a day or two, you will usually have to pay a yearly fee at a minimum. For example, it is possible that you could complete all the changes you want to make to your test site in 2 or 3 days. However, you will have to pay for a whole year’s worth of hosting.

Instead of wasting lots of money on paying hosting fees that you will not use, you can use UpdraftClone instead for just the time frame you need it for. This can save you lots of extra time and money, making the whole process much more user friendly..

UpdraftClone will allow you to create a clone with the same configuration as the original site. You don’t need any advanced coding or technical knowledge to configure the staging site as it is all taken care of. UpdraftClone also uses a cloud-based VPS server, which is more reliable and efficient than other servers.

How to clone a site using UpdraftClone

UpdraftClone works on a token basis, which can be purchased in our store. You will need 1 token to generate a cloned version of yoursite for 24 hours. For each subsequent week, 1 additional token is required to keep the site live.

To start and set-up your clone, you can purchase 5 tokens for a 1 month package that will only cost users $12. Within this period, you can host your cloned staging site for a month and test/update any new flow/functionality to your website.

The process of cloning your WordPres site using UpdraftClone is straightforward and easy to do – even for those without expert knowledge of WordPress.

Once you have purchased your Clone tokens, login to the WordPress dashboard of your live site. Head over to the Settings >> UpdraftPlus Backups. Under the ‘Migrate/Clone’ tab, click on the ‘UpdraftClone’ button.

You will be presented with a form in which you will need to connect your UpdraftPlus account. You can connect it through your UpdraftPlus.com credentials or by using a UpdraftClone key.

To get an UpdraftClone key, login to UpdraftPlus.com.
Navigate to the My account >> UpdraftClone.

Click on the ‘Create keys’ button under the ‘UpdraftClone key management’.

Next, click on the ‘Show existing keys’ button and you will see a couple of keys created. You can use a single key to start cloning your site.

You can choose either option – UpdraftPlus credentials or UpdraftClone key – Just click on the ‘Connect’ button when ready.

On the next screen, all the default settings will display, much like the screenshot below. It also shows you the current running version of PHP and WordPress on the cloned site.

These should be the same settings your live site is using. As such, you should get an exact production-ready environment for your cloned site. Press the ‘Create clone’ button and let UpdraftClone carry out the process of cloning your site on the staging server.

UpdraftClone will show you the cloning progress on the same screen as it may take a couple of minutes to fully clone your site, depending on the size of all the images, plugins, content etc. During the process, you will be presented with the staging URL of the clone version. Your admin and password details will then be sent to you via your UpdraftPlus registered email. This is the URL you can use to work when carrying out changes and updates – risk free.

How to make changes on a cloned site?

Once your website is cloned on a VPS server, you will obviously want to make changes to it. For that, you need access to the filesystem and most probably database. You can get access to these options from your ‘My Account’ on UpdraftPlus.com.

Go to the My account >> UpdraftClone page. Here you will get a list of your clone sites. Click on ‘Manage’ next to the clone you just created.

On the next screen, you will see the options like Database Login, SSH access, SFTP access, etc. In order to update a website flow, you will be required to have filesystem access. Click on the ‘Show SFTP access credentials’.

This will present you with the SFTP credentials of your cloned site. Using these credentials, you can connect to the staging site through FTP client and modify the files as per your requirements.

Using the same method, you can enter the database by clicking on the ‘Database Login’ box.

That’s it! You can now test the new changes on your cloned staged site. Once you are done with the changes and are happy that everything works to your standards, you will need to move them to the live site. If you want an exact copy of the new cloned staging site on the live one, then you can achieve this by using the UpdraftMigrator plugin. See the following tutorial, which explains how to migrate a site to another server using UpdraftMigrator.

Happy cloning / staging! 

The post How to create a staging site/clone for WordPress with UpdraftClone appeared first on UpdraftPlus. UpdraftPlus – Backup, restore and migration plugin for WordPress.

How to protect customer data and prevent GDPR breaches on your WordPress site

For UpdraftPlus’s own privacy policy and how we deal with GDPR, please go to the privacy centre.

Up until the advent of the internet, the most a company would know about their customers was their names, address, maybe their purchase history and little more. Fast forward to 2021, and businesses have access to all aspects of a customer’s (or potential customer) interests, bank details, email addresses, hobbies, desires, passions and goals – as well as some very personal information that the potential customer might not even be aware they are sharing. While this information has allowed companies to better serve and market towards customers, if this treasure trove of personal data gets into the wrong hands, it can cause a major problem for all involved. 

In this blog, we will discuss how to protect customer data and prevent GDPR breaches. But first it is important to define what a data breach is and what GDPR means. 

What is a data breach? 

A data breach is an incident that allows outsiders or unauthorized personnel to access or obtain confidential information from a system, without the permission of the owner. While cybercriminals represent the most common threat to data protection, they aren’t the only culprits. Employees and coworkers can either accidentally or maliciously share data with unauthorized persons, which can also result in a data breach. 

What is GDPR? 

GDPR stands for general data protection regulation, and as the name implies, it is a regulation that addresses data protection and privacy. While GDPR applies to countries and companies operating with the EU, countries all over the world have similar GDPR-like policies in place.

In May 2018, the EU implemented the GDPR to ensure that citizens of the EU and EEA region have greater control over what personal information they allow access to, how that information is used and what assurances they have regarding the protection of that information by the companies involved. The GDPR directive stipulates that personal data includes name, IP address, banking details, email address, photo, location, or medical information. This regulation applies to every company with customers that are EU and EEA citizens. 

10 ways to keep your customer subscription data safe and prevent GDPR breaches

If a company finds itself victim of a data breach, it can find itself facing an expensive bill. Under GDPR guidelines, a company can face fines of up to 20 million or 4% of their annual turnover due to a breach. However, the following practices can drastically reduce your chances of experiencing a security breach. 

1. Only collect essential data 

Your company’s database should consist of only information that is crucial to your marketing efforts. The more personal the information that is obtained from customers, the more valuable they will be to hackers and cybercriminals.  

A crucial part of customer data management is deciding which data you should collect and what you don’t need. Between 60% and 73% of data collected by companies is unused for analytics, which shows that organisations probably don’t need as much information as they think they do to conduct business. 

What comprises essential data for your company depends on your marketing goals and your ability to analyze the data to gain insights. Since marketing goals evolve, regularly evaluating the type of data you collect can save you trouble and aid your compliance with data protection regulations. 

2. Perform routine vulnerability and risk assessments

According to the Center for Internet Security (CIS), vulnerability management is the third most important action you can take to protect your organization from data breaches. 

The processes involved in vulnerability management include identifying possible security breaches and classifying them according to their threat level. Regular risk and vulnerability assessments help you identify holes in your defences and take measures to plug them. 

When carrying out these assessments, you should leave no stone unturned. Inspect and evaluate your data storage, software and data security policies – like the use of personal devices and remote ‘work from home’ access for employees. 

WordPress itself is a very secure platform. However, it helps to add some extra security and firewall to your site by using a security plugin that enforces a lot of good security practices.

You can also install the All In One WordPress Security plugin on your WordPress site. This plugin can help improve your website security. It works by analyzing your site and reduces security risk by checking for vulnerabilities. By implementing and enforcing the latest recommended WordPress security practices and techniques, you can help patch any potential weaknesses, before they become an issue. 

3. Involve every member of your team 

It is imperative that every employee play their role to prevent a breach. Your defences are only as strong as your weakest link and without proper security awareness and education, employees can unknowingly become that weak link to hackers and cyber criminals. 

Employees should also be trained on how to identify security threats – what comprises “sensitive information” and how to immediately report data leakages and breaches. Employees should also be aware of the latest phishing and hacking techniques employed by cybercriminals (such as legitimate looking fake emails), and how to prevent them.  

4. Adhere to data protection regulations 

Data protection laws and guidelines are more stringent today than they were just a few years ago. This is in part because the amount of personal data collected by organizations has increased dramatically with the advent of smart phones. Additionally, the rise in the sophistication and potency of cybercriminals and their operations has seen ‘hacking’ and the theft of personal data become an almost acceptable career in some countries. 

In this day and age, abiding by data protection regulations such as GDPR helps you to prevent leakages and avoid potential fines. It can also save your company’s reputation and increase customer trust. 

5. Restrict data access 

Just like secrets, the fewer people that have access to data, the lower the chance that it will be leaked. It is worth remembering that not all employees need the same level of access to sensitive customer information.  

A good code of practice to follow is to segment customer data, and then grant levels of access to staff for each segment depending on the staff member’s need to access that information. 

While this may be a time consuming and painstaking process, compared to potential lawsuits, hefty fines, reputation damage and potentially millions of dollars in lost revenue; it is more than worth it. 

6. Data encryption 

Data encryption is the practice of encoding data (such as messages and files) to make them unreadable to unauthorized persons. By following the process of converting sensitive information from the plain, readable format to ciphertext; you can achieve data that is in an encoded format. 

A crucial aspect of your data security plan should include provisions for encryption of sensitive data. Personal data across all devices used for company functions should be encrypted including messages, calls, and emails. 

With data encryption, you can securely save sensitive data on the cloud or on connected servers. 

7. Two-Factor authentication (2FA)

Two-factor authentication is a data security measure that requires two different forms of identification to gain access to an online account. 2FA combines a password with another credential – such as a one time password, security badges or biometric data (such as a fingerprint). This adds an additional layer of security and by requiring 2FA across all company devices and systems – this would improve your data security hugely. 

8. Regular security updates 

You may have suspected it, but the main reason giant companies like Apple provide regular updates for their software (iOS & Mac OS) is to patch up weak spots and loopholes that hackers could potentially exploit. 

By regularly updating your security software, you can reduce its weaknesses and increase its efficiency. 

9. Online and offline data backup 

While this is not particularly intended to prevent a breach, it can save you a lot of time, money, and trouble in the event of data theft or loss. Having a secure backup means that your customer subscription data, as well as other sensitive information, is safe. 

The longer your site is suffering from downtime as you try to recover the missing data, the more money you lose. A recent report suggests companies can lose as much as $300,000 per hour due to the downtime in the event of a hack, bug or server issue. 

By backing up your site using UpdraftPlus, you can be sure that you will always have a secure backup of your original website, should you ever need to restore it. 

10. Have a data breach response plan 

If all else fails and your preventative measures are still breached, then what? Having a Plan B, such as an organizational data breach response plan, can mitigate the potential damage of a data breach. Under GDPR guidelines, your customers have the right to know that their data and personal information could be compromised within the first 72 hours of a breach. As such, your plan should always include how to inform your customers. According to the US Chamber of commerce, 68% of small businesses lack a disaster recovery plan. Putting together a plan for your organization puts you a step ahead of the curve. 

Data breaches that companies can experience

Data breaches can occur through various means, but here are the most common. 

Phishing
Phishing is when cyber criminals try to gain access to sensitive data, such as your banking details and passwords. They achieve this by posing as a reputable company or individual you may already have dealings with and often informing you of a problem that requires you to click on a link that downloads malicious software on your computer. Training employees on how to spot phishing attempts in emails, messages and adverts can help prevent these types of attacks. 

Brute force cyber attack
This is a more direct type of attack GDPRwhere hackers use software tools to try to guess your password. With the rapid speed of modern computers, it takes far less time to guess passwords correctly than it used to. Your best chance against this type of cyber attack is to have longer and more secure passwords. A good practice would be the use of password phrases; as they are easier to remember, and harder to guess. 

Malware
Intruders can install malware or spyware on your devices to allow them access confidential files without your notice. Malware is typically a piece of malicious software, and it’s activities and presence can go unnoticed for a long enough period of time to cause significant damage. Malware can be installed on your computer physically or virtually through sources such as an email link. Learning how to spot these attacks and restricting access to your computer can help avoid this type of attack. 

Human error, accidents and theft
In a way, human error will play a role in almost all the types of cyber attacks. Granted, malicious software will take advantage of already existing weaknesses in your system’s defences, but you still have to be careless with your computer or click on a malicious link for it to work. On the other hand, a stolen computer or a laptop left at a bus stop can potentially give the thief access to sensitive data. 

What to do in the event of a data breach? 

Bad press, lawsuits, financial losses and distrust are some of the effects of a data breach. In the event of a breach, the focus shifts to how you can manage your organisations reputation and build back trust in employees and customers alike. Here is how you can do that: 

Good PR
An excellent PR team will work to ensure your customers understand you are on their side. It helps if you have a PR team on standby with a pre-planned sequence of actions that can be implemented within hours in the event of a data breach.  

Transparency
What’s worse than a breach and leak of sensitive customer data is a cloud of dishonesty and deceit in its aftermath. The pushback and consequent cost of the breach can be mitigated with a level of transparency and cooperation with the affected customers. 

Kick-start your data breach response plan
Regardless of how much you try to prevent it, with advancing technology and cybercrime sophistication, there’s still a chance of a data breach, no matter how small. Actions in your response plan should include a public address and some sort of compensation plan for the affected customers. 

Conclusion 

$4.24 million is the average cost of a data breach in 2021 according to IBM. That’s a significant enough amount of damage for it to be taken seriously. Whether or not your business operations are digital, if your customer data is stored on any technological device, you should pay attention to the steps above. Learning how to protect customer data and prevent GDPR breaches imply that you are prioritizing your customers’ privacy. That practice boosts your reputation and encourages brand loyalty.

The post How to protect customer data and prevent GDPR breaches on your WordPress site appeared first on UpdraftPlus. UpdraftPlus – Backup, restore and migration plugin for WordPress.

Speed up your WordPress site using image optimization

‘When evaluating the speed and performance of your website, there are over 200 factors that search engines like Google use to rank content and web pages. Some of these factors are known, such as site update frequency, while the weight of other factors – such as meta-tag spamming, are not known to the extent they impact the ranking score and how they affect a site.

Possibly the most important factor when deciding your site’s Google ranking is it’s loading speed and how long the site takes to completely load on both mobile and desktop.

An important part of the loading speed process, your site’s overall SEO score and speed ranking is image size and image optimization. In this blog we will be looking at why this is important and why you should always have optimized images on your site.

Why is image optimization important?

Since Google considers site loading speed to be one of the main ranking factors when evaluating a site’s SEO score, Google focuses on the overall user experience as a metric for website quality. The speed of a site not only has an impact on SEO score, but has also shown to have a large role in the bounce rate of users, as they typically tend to leave a site if it takes more than 3 seconds to load.

Slow site speed can be responsible for abandoned carts, drops-in conversion rates and other problems that might cause the user experience to be negatively rated. If an e-commerce site is making $100,000 per day, a 1 second page delay could potentially cost you $2.5 million in lost sales every year. A large portion of a website’s weight and loading speed factors can be attributed to the size of your image. Compressing your images will reduce the time it takes to load them in a user’s browser, improving the overall loading speed of the website.

It should also be noted that a high speed internet connection is not going to solve the problem of a slow loading website, as the loading speed is largely dictated by the host that is hosting your files, and can only upload them at a certain bandwidth.

How can you check your site speed?

It is possible to check your site speed using simple online tools. Some of the most commonly used web tools are listed below;

Google Insights

This is a developer’s tool that was introduced by Google for the single purpose of identifying site speed on a user’s desktop or mobile. This site should typically be your first port of call when evaluating site speed, as it belongs to the same organization that is responsible for ranking your website. As such, this adds a further level of legitimacy and behind the scenes knowledge when evaluating your site speed.

Insights not only measures the speed for both desktop and mobile, but also provides a breakdown of all the reasons why and where any issue to the site speed lies. Google Insights also delves deep into the images and checks for the potential reduction in file size. This platform also allocates a score to your website, allowing you to gauge any short term improvements and errors that you may have made, which you might not have realized otherwise. 

GT Metrix

GT Metrix is broadly similar to Google Insights, in that It more or less provides the same information and allocates a ranking score for your website. GT Metrix not only identifies any problems with your site, but also provides potential solutions to any detected speed issues that may be slowing you down. If you are looking for something outside the Google ecosystem, this is a site that you should consider getting familiar with. 

If you have checked your site speed and image size has been flagged up as an issue, where do you go from there?

WP-Optimize – the WordPress plugin that makes image optimization simple

WP-Optimize is one of the leading WordPress optimization plugins that is trusted by over a million users all over the world, with a 4.8 out of 5 ranking on WP.org. Wp-Optimize focuses on the 3 main components when optimizing your site:

  1. Cleaning your database.
  2. Compressing your Images.
  3. Website caching.

While there are several overall different methods WP-Optimize can help with your site SEO, we will be focusing on the image compression aspect of the plugin for this blog. As mentioned above, image compression has long been an issue when it comes to site speed and just making these changes can have a big impact on loading times..

WP-Optimize uses a cutting edge ‘lossy technique’ to compress large image files ( high load times) to smaller compressed versions ( low load times). All of the compressed images are then directly saved to the site’s image library, where they are accessible and reversible to their original size (should you wish to change them back). 

With WP-Optimize, you can compress different image file formats including; JPG, PNG, GIF, BMP and TIFF. When deciding which images you should compress, it is recommended that Images up to the size of 5 MB should be optimized for faster loading speeds. You should also always remember to take a back-up of your site using UpdraftPlus before compressing any images or making any kind of change to your site, as potential issues may arise.

Additional features of WP-Optimize image optimization include:

Bulk compression

Allows you to select and compress all your images together. This can potentially save you a lot of time, as some sites can have hundreds, if not thousands of images that need compressing.

Intelligent, multi-pass lossy compression algorithm

The algorithm is created in such a way that it gives users twice the compression with a lot less loss of image quality.

Restore to the original image

While ‘Ctrl+Z’ can come in very handy in lots of online applications, it isn’t something that is usually found with an image optimization plugin. With WP-Optimize, you can revert back to the original images at any time. 

Auto compress 

Auto compress allows for all of your future images that will be uploaded to your website to be compressed automatically. This means you will not have to manually compress your images every time you upload a new one. Just select your compression settings and WP-Optimize will compress all of your images in real time as they are being uploaded onto the website.

Keep your EXIF data

If your website is related to high end photography (for example, a wedding photography site), the photographic data of your images can be incredibly important. With most image compression plugins, this data would be lost post compression. But with WP-Optimize, you can select to keep the original photographic EXIF data, even if you decide to compress a 2GB image to 500k. 

Conclusion

WP-Optimize is a great option that includes many different optimization factors in one convenient plugin. As an overall WordPress optimization plugin, WP-Optimize is as good as, if not better, than some of the ‘top’ paid plugins. The following chart shows how WP-Optimize compares to leading SEO plugins like WP-Rocket, W3 and WP Fastest Cache.

If you are looking to improve the loading speed of your site, compressing your images is a great way to start. Download WP-Optimize today and see the difference a good optimization plugin can make to your WordPress site.

The post Speed up your WordPress site using image optimization appeared first on UpdraftPlus. UpdraftPlus – Backup, restore and migration plugin for WordPress.

Why should you add two-factor authentications (2FA) to your WordPress site in 2021?

Once you have created your WordPress site, there are several factors you need to consider to keep your new site safe, whether it’s making sure your site is secure, you have regular backups scheduled or that your plugins are up to date.  

two factor authentication

If you are establishing your business and brand in the online world, it is important to ensure that your site is not vulnerable to hackers and cyber attacks.  

According to Security Magazine:  “Every day, there are over 2,200 cyberattacks – which is nearly one every 39  seconds.”

  • 43% of small businesses have no cybersecurity defense plan in place. 
  • 60% of small business owners do not think their business is a target for cybercriminals.
  • 74% of small business attacks were executed by external actors, as opposed to internal employees
  • 84% of small business attacks focused on the monetary gain with 8% focused on espionage and the remainder focused on hacking for fun or grudges
  • 22% of small businesses transitioned to remote work without a cybersecurity plan in place.

To minimize and limit your site’s vulnerability and risk of cyber-attacks, WordPress provides you with the ability to install and use two-factor authentication on your website.

In 2021, it was reported that only 57% of businesses around the world will use some form of online Multi-Factor Auth (MFA) as a method of authentication, designed to add an extra layer of protection on top of users’ login credentials. Of those employees using MFA, 95% reported using a software-based 2 factor authentication tool (such a mobile phone app), while 4% have a hardware-based 2 factor authentication solution, with roughly 1% using biometrics.

What is Two-Factor Authentication and how does it work? 

2FA refers to the process by which the person has to complete an extra level of login security verification to show that they have the necessary permissions required to access the site, documents, applications, sales information etc.

What are authentication factors?

While all sites will have at least one login process to access your account, there are several ways in which a user can be authenticated using an additional authentication method. Most authentication methods typically rely on the user’s knowledge factors, which includes login information such as traditional passwords. By adding an additional 2 factor authentication method, this forces the user to give extra information, which is either a possession factor or an inherence factor.

Knowledge Factor – This refers to the typical username/passwords and pin codes through which you can access a website account. No matter what type of password you select; including numbers,  words, symbols, uppercase, and lowercase, it will still be considered ‘basic security’. 

Personal/Possession Factor – This level of security factor refers to something that the user has in their possession. Examples of this can include your ID card, a previously answered security question, a one time password sent to your smart device, smartphone app verification etc. 

Biometric Factor – This can also be known as an inherence factor and is a security factor inherent in the user’s physical self. Typically, these are identified as unique personal physical characteristics such as fingerprint, facial, voice recognition or behavioral biometrics, including keystroke dynamics, gait or speech patterns.

While most two-factor authentication methods will only rely on the first three methods of authentication, there are systems that require further and more detailed security and will require further multifactor authentication (MFA), which requires two or more independent credentials for more secure login/authentication.

Location and Timing Factor – Some sites containing sensitive and personal information that you may try to log into, such as Facebook and Google, are  designed to notify the owner if they register a user attempting to log into your account from a suspicious location or at an unusual time. If this occurs, the sites send an email to the owners to notify them of the login discrepancies.This method can be enforced by limiting authentication attempts to known user specific devices (such a model of their mobile phone), or by tracking the geographic source of an authentication attempt based on the source Internet Protocol address or some other geolocation information, such as Global Positioning System (GPS) data, derived from the user’s mobile phone or other device.

By using these 2FA methods,  multiple layers of protection can protect your website from  phishing attacks by hackers and other cyber-security problems.

Is 2FA foolproof and can it be hacked? 

2FA can go a very long way in making your site secure. But no matter how thorough and safe your security login process is, nothing can make it 100% safe. Even recently, the popular crypto currency trading exchange Coinbase was hacked by actors who were able to bypass the user’s two factor authentication by cloning their mobile phones and gaining access to generated 2FA text message passcodes. 

2FA security is only as secure as its weakest component. The National Institute of Standards and Technology (NIST) has now discouraged the use of text messages in 2FA services, recommending instead that randomly generated time-limited tokens, owing to the risk of mobile phone cloning or malware that can intercept or redirect text messages.

Many large organizations, such as Google, Facebook, Uber, etc. have fallen victim to data hacks and have found their user information for sale on the dark web. Hackers’ tools and methods of attacks are becoming more sophisticated and harder to detect – incorporating phishing, password spraying, ransomware and malware attacks. While security teams are constantly working to improve online security, they have yet to put an end to the possibility. 

According to Dark Web Price Index 2020:

“Data samples of millions of people sold on the Dark Web range from  $25USD to $6000USD for premium accounts.” 

Typically, If the user has up-to-date security protocols, hackers will usually move on to a user that is more vulnerable and has failed to properly set up their additional security. 

Tips for minimizing the risk of cyberattacks:

Always have a backup of your site: By using UpdraftPlus, you can ensure that you will have a secure and safe backup of your WordPress website. Should the worst happen and your site is the victim of a hack, you can revert to the older version of your site and make changes to your login process to make your site more secure.

Ensure your site has a robust security system: While you can’t remove all of the risk of being hacked, you can minimize it. Ensure that you have a reputable two factor authentication login system for all users with back-end website access. Do not give unnecessary privileges to users if they do not require them, as they can be used to take control of the website. 

Update your plugins/themes/WordPress version: When hacking a WordPress site, this is the most common route of attack. Outdated plugins can be particularly vulnerable to hackers in giving them a route into your site.

Make sure users are aware of the risks: It is vital that everyone with a higher level of access to your site be smart and aware of potential security issues. This means being aware of potential hacking attempts via email phishing scams, that may appear genuine, but are attempts to retrieve user names/passwords and install malware onto your computer.

Strong passwords: While this may seem like the most obvious, it is also often the most overlooked. Having a strong and unpredictable password is often the first and best level of protection against most hacks. Passwords that are changed often and have a string of letters and special characters are very difficult to hack via forced password attacks. 

Ending Notes: 

The more you know, the better your chances are of preventing any kind of cyber attack before it has even begun. A mixture of 2FA, updated software and secure passwords and help prevent the vast majority of attempted hacks. But should the worst happen, always remember that you should have a recent backup copy of your site with UpdraftPlus, which should be stored in a secure remote storage location. 

If you have any suggestions or queries, feel free to comment below. We are  interested in hearing from you.

The post Why should you add two-factor authentications (2FA) to your WordPress site in 2021? appeared first on UpdraftPlus. UpdraftPlus – Backup, restore and migration plugin for WordPress.

Why Should You Add Two-Factor Authentication (2FA) To Your WordPress Site in 2021?

Once you have created your WordPress site, there are several factors you need to consider to keep your new site safe, whether it’s making sure your site is secure, you have regular backups scheduled or that your plugins are up to date.  

two factor authentication

If you are establishing your business and brand in the online world, it is important to ensure that your site is not vulnerable to hackers and cyber attacks.  

According to Security Magazine:  “Every day, there are over 2,200 cyberattacks – which is nearly one every 39  seconds.”

  • 43% of small businesses have no cybersecurity defense plan in place. 
  • 60% of small business owners do not think their business is a target for cybercriminals.
  • 74% of small business attacks were executed by external actors, as opposed to internal employees
  • 84% of small business attacks focused on the monetary gain with 8% focused on espionage and the remainder focused on hacking for fun or grudges
  • 22% of small businesses transitioned to remote work without a cybersecurity plan in place.

To minimize and limit your site’s vulnerability and risk of cyber-attacks, WordPress provides you with the ability to install and use two-factor authentication on your website.

In 2021, it was reported that only 57% of businesses around the world will use some form of online Multi-Factor Auth (MFA) as a method of authentication, designed to add an extra layer of protection on top of users’ login credentials. Of those employees using MFA, 95% reported using a software-based 2 factor authentication tool (such a mobile phone app), while 4% have a hardware-based 2 factor authentication solution, with roughly 1% using biometrics.

What is Two-Factor Authentication and how does it work? 

2FA refers to the process by which the person has to complete an extra level of login security verification to show that they have the necessary permissions required to access the site, documents, applications, sales information etc.

What are authentication factors?

While all sites will have at least one login process to access your account, there are several ways in which a user can be authenticated using an additional authentication method. Most authentication methods typically rely on the user’s knowledge factors, which includes login information such as traditional passwords. By adding an additional 2 factor authentication method, this forces the user to give extra information, which is either a possession factor or an inherence factor.

Knowledge Factor – This refers to the typical username/passwords and pin codes through which you can access a website account. No matter what type of password you select; including numbers,  words, symbols, uppercase, and lowercase, it will still be considered ‘basic security’. 

Personal/Possession Factor – This level of security factor refers to something that the user has in their possession. Examples of this can include your ID card, a previously answered security question, a one time password sent to your smart device, smartphone app verification etc. 

Biometric Factor – This can also be known as an inherence factor and is a security factor inherent in the user’s physical self. Typically, these are identified as unique personal physical characteristics such as fingerprint, facial, voice recognition or behavioral biometrics, including keystroke dynamics, gait or speech patterns.

While most two-factor authentication methods will only rely on the first three methods of authentication, there are systems that require further and more detailed security and will require further multifactor authentication (MFA), which requires two or more independent credentials for more secure login/authentication.

Location and Timing Factor – Some sites containing sensitive and personal information that you may try to log into, such as Facebook and Google, are  designed to notify the owner if they register a user attempting to log into your account from a suspicious location or at an unusual time. If this occurs, the sites send an email to the owners to notify them of the login discrepancies.This method can be enforced by limiting authentication attempts to known user specific devices (such a model of their mobile phone), or by tracking the geographic source of an authentication attempt based on the source Internet Protocol address or some other geolocation information, such as Global Positioning System (GPS) data, derived from the user’s mobile phone or other device.

By using these 2FA methods,  multiple layers of protection can protect your website from  phishing attacks by hackers and other cyber-security problems.

Is 2FA foolproof and can it be hacked? 

2FA can go a very long way in making your site secure. But no matter how thorough and safe your security login process is, nothing can make it 100% safe. Even recently, the popular crypto currency trading exchange Coinbase was hacked by actors who were able to bypass the user’s two factor authentication by cloning their mobile phones and gaining access to generated 2FA text message passcodes. 

2FA security is only as secure as its weakest component. The National Institute of Standards and Technology (NIST) has now discouraged the use of text messages in 2FA services, recommending instead that randomly generated time-limited tokens, owing to the risk of mobile phone cloning or malware that can intercept or redirect text messages.

Many large organizations, such as Google, Facebook, Uber, etc. have fallen victim to data hacks and have found their user information for sale on the dark web. Hackers’ tools and methods of attacks are becoming more sophisticated and harder to detect – incorporating phishing, password spraying, ransomware and malware attacks. While security teams are constantly working to improve online security, they have yet to put an end to the possibility. 

According to Dark Web Price Index 2020:

“Data samples of millions of people sold on the Dark Web range from  $25USD to $6000USD for premium accounts.” 

Typically, If the user has up-to-date security protocols, hackers will usually move on to a user that is more vulnerable and has failed to properly set up their additional security. 

Tips for minimizing the risk of cyberattacks:

Always have a backup of your site: By using UpdraftPlus, you can ensure that you will have a secure and safe backup of your WordPress website. Should the worst happen and your site is the victim of a hack, you can revert to the older version of your site and make changes to your login process to make your site more secure.

Ensure your site has a robust security system: While you can’t remove all of the risk of being hacked, you can minimize it. Ensure that you have a reputable two factor authentication login system for all users with back-end website access. Do not give unnecessary privileges to users if they do not require them, as they can be used to take control of the website. 

Update your plugins/themes/WordPress version: When hacking a WordPress site, this is the most common route of attack. Outdated plugins can be particularly vulnerable to hackers in giving them a route into your site.

Make sure users are aware of the risks: It is vital that everyone with a higher level of access to your site be smart and aware of potential security issues. This means being aware of potential hacking attempts via email phishing scams, that may appear genuine, but are attempts to retrieve user names/passwords and install malware onto your computer.

Strong passwords: While this may seem like the most obvious, it is also often the most overlooked. Having a strong and unpredictable password is often the first and best level of protection against most hacks. Passwords that are changed often and have a string of letters and special characters are very difficult to hack via forced password attacks. 

Ending Notes: 

The more you know, the better your chances are of preventing any kind of cyber attack before it has even begun. A mixture of 2FA, updated software and secure passwords and help prevent the vast majority of attempted hacks. But should the worst happen, always remember that you should have a recent backup copy of your site with UpdraftPlus, which should be stored in a secure remote storage location. 

If you have any suggestions or queries, feel free to comment below. We are  interested in hearing from you.

The post Why Should You Add Two-Factor Authentication (2FA) To Your WordPress Site in 2021? appeared first on UpdraftPlus. UpdraftPlus – Backup, restore and migration plugin for WordPress.

WordPress Caching guide: How does it improve your site speed? 

In this blog, we will discuss WordPress caching; what it does – and how it improves the performance and speed of your website. 

What is Caching? 

To understand WordPress caching, you first have to understand the concept of caching. Caching refers to the process of storing data in temporary folders where they are easily accessible. It’s primary aim is to reduce processing time and make information available as quickly as possible. 

This is especially important in WordPress websites. WordPress websites are dynamic by default, which means that each time a user visits your site, WordPress goes through a series of steps to generate information from your database to show to the visitor. 

The benefit of this process is that the user gets a somewhat customized experience, since the pages are generated specifically for them. This benefit has the drawbacks that occur as a result of the long processing time, which can make the website slower.

When it comes to caching specifically in WordPress, it works by following the process of temporarily storing the dynamically generated files of frequently visited pages on your website as static files for easy recollection and use. Caching reduces the demand on your web server to continuously generate dynamic content. This means that when a user visits a page, the page shown to the user is stored exactly how it appeared the last time they visited, so the next time that page is requested, there’s no need for WordPress to generate a new page. It just presents the previously generated page, at a rate that is 3-5 times faster.

There are two types of content available on web pages:

  • Static files: As the name implies, static files refer to the types of content that do not change. These types of files include images, javascript files, css stylesheets, and HTML pages. Static content remains the same regardless of the user and is created long before they are needed.
  • Dynamic files: Dynamic content is created at the point of request, specifically for the user. This type of content is created based on the user’s location, device and time of request.

WordPress caching is the process of storing these dynamic files as static files, thereby increasing the speed and performance of your website. 

There are two basic types of caching – Client-side and server-side. 

Client-side Caching 

Client-side caching occurs when the temporary caching files are stored on the end user’s device. Modern browsers have the benefit of having smart coding that aims to reduce redundancies by saving static files for future use. 

As a result, when users open a web-page, the browser starts downloading static files such as images, HTML pages and other multimedia content. Their browser saves all these files so it doesn’t have to re-download them every time you visit the site in the future. 

While this helps with the speed of your browsing, it is recommended that you clean up your cache data once in a while so the files don’t become too bulky and reduce the performance of your browser.

Server-side Caching 

Server side caching refers to the caching protocol employed by your WordPress server to save temporary files. There are four possible protocols for WordPress Caching; 

  • Page caching 
  • OPcode caching 
  • Object caching 
  • CDN Caching 

Page Caching 

Page caching occurs when your caching plugin – like WP-Optimise – saves the dynamically generated HTML files on your server’s hard disk (RAM) after the first time it is loaded. Whenever there is another request for that page, your server produces the previously generated data.

OPcode Caching 

When a PHP file is loaded on the website, OPcode caching saves the compiled PHP code. For a PHP code to execute, it must be generated and compiled by the PHP compiler. OPcode caching saves the initially generated code on the server’s RAM, to save time upon subsequent requests. 

Object Caching 

Object based caching saves database queries after the first time they are requested. This way, it reduces PHP execution time and load time when the query is requested again. Since WordPress is a content management system that is reliant on databases, object caching seeks to reduce the load on the database and reproduce previously loaded content faster. This is crucial for high traffic websites. So crucial that WordPress has its own internal caching system that can be enhanced with a third party tool.

CDN Caching 

CDN (content delivery network) caching refers to the process of storing web content in proxy servers that are much closer to the end user. By using proxy servers, CDN caching helps your website to deliver content much faster. 

How does WordPress Caching improve your WordPress site speed and performance?

WordPress caching increases the speed of your website in three primary ways

Moves files to “recent memory”

You may be aware that computers and computer systems are built to mimic the brain. Caching is a prime example of that. 

When you try to remember an event from your childhood, it takes a while before you fully recollect the details. However, if you try to remember that same event days later, you remember the details almost at once. This is because your brain moved the event to a recent memory. It may surprise you to learn that you are not remembering the event, but you are in fact remembering the last time you remembered the event. 

Caching adopts this same principle by storing previously loaded web elements in a “recent folder.” As a result, your web pages load faster when they are requested. 

Saves files closer to the end user

Another way caching increases the speed of your website is by delivering content that is closer to the user; either from a server close by or from the user’s hard disk. This is a combination of client-side and server-side caching. 

Compress images 

Caching plugins like WP-Optimize give you the option of compressing your images. Bulky images take more time to load which can slow down the overall speed of your website. With cache plugins, you can manually or automatically compress images to reduce load time.  

How Caching boosts performance of your WordPress website 

Caching plugins don’t only increase your load speed, but they reduce the workload on your server. The following are the ways by which caching improves your website’s performance

Improves user experience 

Consumer attention span reduced from 12 seconds to 8 seconds in just 16 years from 2000 to 2016. There’s an explanation for this; technological advancements, intense competition and over stimulation of the mind from smart devices are the most significant culprits. 

This now means that you have only a few seconds to make an impression or lose the user to a potential competitor. Research suggests that slow websites are a huge turnoff to modern day internet users. 

There is also a correlation between higher bounce rates and slower pages, which means the longer it takes your page to load, the higher your bounce rate. The ideal page load time is under 2 seconds. A load time beyond 3 seconds can increase page abandonment rate by up to 87%.  

Improves ranking 

Website speed is a performance and ranking factor for search engines. In recent times, search engines like Google have begun to penalize slow websites. Websites with longer page load times are eventually pushed farther down the pecking order and replaced by faster websites. 

Google prioritizes user experience as a ranking factor and site speed is a crucial aspect of the UX. When users get disappointing experiences from the websites search engines direct them to, it reflects poorly on the search engine. Users are then less likely to trust the search engine results if that trend continues. 

Boosts content availability 

Several factors affect whether or not your website will load for a user. Frequent network interruptions or network congestion for example, are two of those factors. Since WordPress dynamically generates content for the user, this could greatly affect the performance of your website for that user. 

Caching solves this problem by providing an already generated page for the end user. This way, you won’t lose a potential or active customer to a poor network connection.

Cleans your database 

Caching plugins like WP-Optimize work to clean your database by de-fragmenting MySQL tables and clearing data like trashed comments, expired transient options, pingbacks, etc. This process is important because without it, your website’s performance and speed reduces overtime. 

Conclusion

Chances are that you may never get to notice how your website interacts with every end user. You can’t tell what happens when people try to access your website from halfway across the world. But what you can do is ensure that your WordPress site’s performance and speed are optimal at all times. With WordPress caching, you don’t have to lose sleep worrying about all that. Install a reputable plugin like WP-Optimize, and buy yourself some time to focus on other aspects of your business. 

The post WordPress Caching guide: How does it improve your site speed?  appeared first on UpdraftPlus. UpdraftPlus – Backup, restore and migration plugin for WordPress.

How to update your site to the latest version of WordPress

If you have a WordPress website, you will know that it should always be run on the latest version of WordPress as the updated version of the software provides better performance and security.

In this blog, we will discuss all the ways you can update your website to the latest version of WordPress. We will go through the process on how to download the latest WordPress version and update it manually and also show you how to automate your WordPress updates – which can be highly beneficial, as it can save you a lot of time and effort.

Why you should always use the latest version of WordPress

WordPress is an extremely popular and open source software platform. This means everyone can study the code, as it is available publicly as open source. This allows developers to analyze, improve and contribute to the WordPress codebase. Whenever a developer finds any bugs or security issues, it is reported to the WordPress software team, who then fix the issue and release a new WordPress update, with all the issues hopefully fixed. This approach to problem analysis/solving has largely been the reason why WordPress has managed to grow so rapidly.

However, the web is not  populated only by people with good intentions. There are entire cottage industries in operation that exist to employ hackers to actively look for vulnerabilities and loopholes in the source code. As it powers over a third of all the websites in the world, WordPress is a hugely popular target and often top of the list for hackers. If a vulnerability is found in an older version of WordPress, hackers will attack these sites and steal all valuable data (such as emails, billing information etc).

Apart from security fixes, users of WordPress will also get access to new features and better performances when they download the latest version of WordPress. For example, the latest WordPress 5.8 version has introduced a few new features that you can read in the release documentation.

Now you are aware and understand the need to upgrade WordPress, let’s take a detailed look at how to perform the upgrade. 

Things to do before upgrading WordPress

Whenever you plan to update the software, remember to always take a backup of the current site with UpdraftPlus. By doing this, you will be able to restore the site immediately if the new updates result in unexpected issues and break your website. It is recommended that you store your backup in a remote storage location (such as Google Drive), so you will always have access to it; even if an upgrade causes an issue with your server.

For extra safety and security, you can also use UpdraftClone to create an identical copy of your site and test out any update on, further removing any potential risks as UpdraftClone allows you to create a cloned test site of your live site instantly and directly from UpdraftPlus. Once you have created a clone of your site, you can carry out updates and tests, safe in the knowledge that your live site is completely safe from any potential issues. 

When it comes to WordPress backup, UpdraftPlus is the number one choice of users. At the time of writing this article, it is being used on over 3 million websites. Follow our guide: How to Backup a WordPress Site: Step by Step Guide for instruction on how to backup your site before updating WordPress.

Once you have your website backed-up, remember to choose the right time to schedule your upgrade. Updating WordPress usually only takes a minute or two, but in certain situations it may take longer than expected. During this process, it is important to remember that customers/visitors to your site should not face any unexpected behavior or access issues. To avoid this, it is best to pick a time when you typically have less users active on the site.

Manually upgrading WordPress to the latest version

WordPress regularly releases updates with both major and minor releases. Minor releases are typically reserved for security and bug fixes. Since WordPress 3.7 or above, automatic updates are turned on for minor releases. This means you do not need to upgrade it manually as WordPress handles these minor updates on it’s own.

When it comes to major releases, there are 2 options available to upgrade to the latest version – automatic (via a press of button) or manual. 

Upgrading WordPress from the Dashboard

This is a straightforward and easy to follow process. All you need to do is press on the “Update now” button and the upgrade will start automatically. It can be done in a few moments.

To access this option, go to Dashboard->Updates page in your WordPress site. You will see the ‘Update now’ button as shown below.

In the screenshot, you will see that it states that your site will be in maintenance mode until the updates are complete. As previously mentioned, this is the reason for picking the “low visitor” hours when carrying out your upgrade.

Press the ‘Update now’ button and WordPress initiates the upgrading process for you. It may take a couple of minutes.

Once WordPress has installed the updates, you should be redirected to a page where you can see a list of new features available in the latest update.

There may be some cases where this process is not possible. If this is the case, you can follow the below update process instead.

Upgrade WordPress using FTP Client

In order to update WordPress manually to the latest version, you will need to perform the following steps.

  • Download the latest WordPress zip.
  • Extract the zip.
  • Connect your site with an FTP client (FileZilla is a popular FTP Client).
  • Upload wp-admin, wp-includes directories (from the extracted zip) on your site, replacing older versions.
  • Upload all core files from the root directory of extracted zip. Remember not to change the wp-config.php file.
  • Upload wp-content/index.php. 

WordPress writes the code for core functionalities and new features in the wp-admin and wp-includes folders. The files in the root directory also contain the code for new updates. While updating WordPress, we need to only replace these files and folders. When developing your WordPress websites, remember not to touch these files – at any cost, as it can break the system. These files are part of the core development and must remain untouched.

Once you are done with the manual process, go to the admin area of your site. Sometimes you need to update your database for the new version. You may see the below notice asking to update your WordPress database.

If you come across this notice, just press the ‘Update WordPress Database’ button.

After this, login to your admin area – you should now see you have successfully updated to the latest version of WordPress.

It is important to carry out due diligence on your site after an update. Browse your site and make sure everything is in the right place and is working correctly. Most of the time, WordPress updates will not cause any issues if you are using the system correctly and carried out the update in the proper manner. However, if you are experiencing unpredictable behaviour, you can quickly restore your site to the older working version using your UpdraftPlus backup.

You can also save further time by automating the WordPress updates process using the Easy Update Manager plugin.

Manage automatic WordPress updates

The Easy Update Manager plugin is built by the same team that brings you UpdraftPlus. At the time of writing, Easy Updates Manager has 300K+ active installations. By using this plugin, you can automate WordPress, plugin and theme updates. 

Users can also use a free version of the plugin with a limited set of features. However, it is suggested that you install the Premium version, as it contains many handy features that can make updating easier and quicker. These include:

  • Safe Update – Block automatic updates if the update states a minimum PHP or WP version requirement that is not met by the site/server.
  • Schedule Updates. Customize your update schedule to minimize any downtime.
  • Auto-update protection. If something goes wrong during an auto-update, the plugin will alert you via email and then try to fix it automatically.

Upon installation, you can find the settings under the Dashboard->Updates options. On this page, you will see the different options to manage WordPress, plugin and theme updates. Under the ‘WordPress core updates’, press the ‘Auto update all releases’ button. 

Add your email address under ‘Core notification emails’. You will now receive an email at this address when your site updates.

When using the premium version of the plugin, you can set your updates to suit your schedule. As previously discussed, if you wanted to update WordPress and pick a time when your site had less visitors, go to the ‘Advanced’ tab and set your preferred schedule time under ‘Automatic update scheduling’.

These are the basic settings required to automate your WordPress updates. Now you can just sit back and relax and let the plugin handle all the upgrading stuff for you.

Conclusion

We have run through both the automatic and manual processes for upgrading to the latest version of WordPress. The user can use either process in order to help keep your site safe from hackers. Remember to always take a backup before updating using UpdraftPlus!

The post How to update your site to the latest version of WordPress appeared first on UpdraftPlus. UpdraftPlus – Backup, restore and migration plugin for WordPress.

How to create a WordPress custom theme

WordPress occupies a huge percentage of the world’s websites, making up 37% of all sites currently online. While there are many reasons and factors for this success, one of the main reasons is the popularity of features available to all users. Plugins, themes, posts, pages, categories, taxonomies, user roles and media handling just to name a few. To get the most out of WordPress, it is recommended users study and learn how to use all of these features. In this blog, we will focus on and discuss WordPress Themes and will walk you through the basics required on how to create a WordPress custom theme.

What is a custom theme?

Everything on the frontend of your site is being run from and controlled using something called a ‘theme’. A website’s theme is responsible for the specific design and functionality of the website. You can check out the WordPress theme repository or Themeforest for theme examples; here you will find thousands of themes listed for you to explore and download.

While established WordPress themes are great, if you have the ability and need, you may also want to build your own custom theme for a client, for yourself, or to submit to the marketplaces with the intention of selling it. When creating a commercial theme, you will need to follow the marketplaces guidelines for coding standards, structure of files and folders, etc. You can find more details regarding these guidelines on the marketplaces websites

In this blog, we will run through a tutorial to show you a basic overview on how to create your very own WordPress theme by covering all the basics and steps associated with the process. 

Create a WordPress custom theme

WordPress themes are built with template files, scripts, styles, images, etc. To proceed, you should have working knowledge of PHP, HTML and CSS, which are required to build a custom theme. Understanding JavaScript can also be an additional advantage.

To get started, we will first name the theme ‘Updraft’. Create a folder called ‘Updraft’ inside wp-content/themes. Within this ‘Updraft’ folder, you will write your theme related code, store files, images, fonts, etc. 

The main files of the custom WordPress theme are:

  • style.css
  • index.php
  • functions.php

The style.css will be the main stylesheet file and you can add all of your CSS in this file. Remember that you must include an information header about the theme. The header should look similar to the below format and be on the top of style.css.

</em></strong>
<strong><em>/*</em></strong>
<strong><em>Theme Name: Updraft</em></strong>
<strong><em>Theme URI: https://updraftplus.com</em></strong>
<strong><em>Author: UpdraftPlus</em></strong>
<strong><em>Author URI: https://updraftplus.com</em></strong>
<strong><em>Description: The custom theme built for the website.</em></strong>
<strong><em>Version: 1.0</em></strong>
<strong><em>License: GNU General Public License v2 or later</em></strong>
<strong><em>License URI: http://www.gnu.org/licenses/gpl-2.0.html</em></strong>
<strong><em>Text Domain: updraft</em></strong>
<strong><em>*/</em></strong>
<strong><em>

Next, go to the Appearance >>Themes, where you will see your theme listed. Activate it. When you check the frontend of your site, it will show a blank screen – as we have not added anything to the theme yet..

Remember to store your images, scripts and styles into your theme directory. The theme directory refers to the ‘wp-content/themes/Updraft’ folder. Be sure to keep them organized by using a good folder structure, creating specific folders for images, scripts and styles; Copy the files into the respective directory.

Functions File

The functions.php is the file where you can add code for different purposes. This file is automatically loaded during WordPress initialization, with the code written in it executed automatically.

The following operations in the functions.php file are usually carried out in this order:

  • Enqueue theme stylesheets and scripts (add the JS and CSS files to the website).
  • Enable Sidebars, Navigation Menus, Post Thumbnails, etc.
  • Define functions used throughout the application.
  • Etc.

The user can add their styles and scripts from functions.php file as follows. Please see the following link for more documentation.

function include_js_css() {
wp_register_style( "bootstrap", get_stylesheet_directory_uri() . </em></strong>
<strong><em>"/styles/bootstrap.min.css", array(), false, "all" );
wp_enqueue_style( "bootstrap" );
wp_register_script('bootstrap', get_stylesheet_directory_uri() . </em></strong>
<strong><em>'/scripts/bootstrap.min.js', array(), false, true);
wp_enqueue_script('bootstrap');
}
add_action('wp_enqueue_scripts', 'include_js_css');

The get_stylesheet_directory_uri() function gives a relative path of the active theme directory. The rest of the code can be seen to be the path of the assets.

Similarly, for adding Navigation Menus, Post Thumbnails:

function updraft_theme_setup() {</em></strong>
<strong><em>add_theme_support( 'post-thumbnails' );
register_nav_menus(
array(
'primary' =&gt; __( 'Primary Menu' ),
'footer1='  =&gt; __( 'Footer Menu' ),
'shop'  =&gt; __( 'Shop Page Menu' ),
)
);
}
add_action( 'after_setup_theme', 'updraft_theme_setup' );

Next, go to the WordPress dashboard and add a post or page. You should see the ‘Featured Image’ section. Additionally, under the Appearance >> Menus, you will find the Primary Menu and Footer Menu under Manage Locations.

These are just a few of the basic features you can cover while using the ‘Function’ file. There are a lot more you can add in this file if you so wished.

Template files

When building your theme, template files can be used to affect the layout and design of different parts of your website. For example, you would use the header.php template to create a header, or the comments.php template to include comments on your site. Template files have a .php extension. As they are PHP files, all pages output as HTML.

Using templates, developers can distribute code among multiple files. Listed below are some of the files in question.

  • index.php : The main template. This file should be responsible for post listing. When you set the Posts page from Settings >> Readings, this template gets executed.
  • page.php : This template is responsible for rendering your pages. This setting can be overridden by assigning a custom page template to individual pages.
  • single.php : Used when a single post is queried.
  • header.php : Add your header part in this template.
  • footer.php : Add your footer part in this template.
  • sidebar.php : Add widgets in this template.

Get a list of all template files available here.

Custom page templates

By default, all your pages are rendered through the page.php template. But in practice, you sometimes have to display separate flows on different pages. In this scenario, it is recommended that you use the power of custom page templates.

For example, if you have a ‘Career’ page and you want to add your code to this page; to achieve this you would need to create a career.php file into the theme directory and place the comment below at the top of the file.

&lt;?php</em></strong>
<strong><em>/*</em></strong>
<strong><em>Template Name: Career</em></strong>
<strong><em>*/

Next, go to the page edit section and assign this ‘Career’ template from under the Page Attributes box.

Now when you visit the Career page – code from the career.php will be executed.

Header file

Your website will have a common header on all pages. You can place this common header into the header.php. The header code will be something like this:

&lt;!DOCTYPE html&gt;</strong></em>
<em><strong>&lt;html &lt;?php language_attributes(); ?&gt;&gt;</strong></em>
<em><strong>&lt;head&gt;</strong></em>
<em><strong>&lt;meta charset="&lt;?php bloginfo('charset'); ?&gt;"&gt;
&lt;meta name="viewport" content="width=device-width, initial-scale=1.0" /&gt;
&lt;?php wp_head(); ?&gt;
&lt;/head&gt;
&lt;body &lt;?php body_class(); ?&gt;&gt;
&lt;?php wp_body_open(); ?&gt;
&lt;!-- your menu --&gt;

In the above code, you will notice that we used some functions available in WordPress.

  • wp_head() : This method inserts crucial elements into your document – e.g., scripts, styles and meta tags.
  • body_class() : This will add different classes to the body element.
  • wp_body_open() : Used to insert code immediately after opening the body tag. An example of this would be the- Google Analytics script.

Menus can be added dynamically through the wp_nav_menu() function. Assuming you have first already created a menu under Appearance >> Menus and assigned ‘primary’ location to it. The code below generates the menu elements dynamically.

&lt;?php</strong></em>
<em><strong>wp_nav_menu(
array(
'theme_location' =&gt; 'primary',
'container_class' =&gt; 'menus',
)
);
?&gt;

Once your header file is set, use the get_header() function to include this file into your other templates.

Footer file

Similar to the header file, your common code for the footer will go inside the footer.php template.

&lt;!-- footer elements --&gt;
&lt;?php wp_footer(); ?&gt;
&lt;/body&gt;
&lt;/html&gt;

Here, use the wp_footer() that inserts elements, specifically scripts, at this location. Using get_footer() will include the contents of this file in other places.

Sidebar file

The sidebar is a vertical column used to display information on your site that is not shown within the main content. It may include popular articles, advertisement banners, a newsletter submission form, etc. Sidebars contain widgets that an administrator can customize. The sidebar.php template will include your site widgets.

In this example, we will create a basic sidebar by adding the below code to the functions.php file.

function updraft_widgets_init() {
register_sidebar(
array(
'name'          =&gt; esc_html__( Home Sidebar' ),
'id'            =&gt; 'sidebar-1',
'description'   =&gt; esc_html__( 'Add widgets here to appear in your sidebar.' ),
'before_widget' =&gt; '&lt;section id="widget" class="widget"&gt;',
'after_widget'  =&gt; '&lt;/section&gt;',
'before_title'  =&gt; '&lt;h2 class="widget-title"&gt;',
'after_title'   =&gt; '&lt;/h2&gt;',
)
);
}
add_action( 'widgets_init', 'updraft_widgets_init' );

Next, go to the Appearance >> Widgets. Here you will find the above sidebar. In this example, we are going to add some widgets to this sidebar. To add this sidebar to the frontend, add the following code in sidebar.php.

&lt;div class="sidebar"&gt;
&lt;?php
if ( is_active_sidebar( 'sidebar-1' ) ) {
dynamic_sidebar( 'sidebar-1' );
}
?&gt;
&lt;/div&gt;

Finally, remember to name the method ‘get_sidebar()’ so you can easily include the sidebar wherever on any other pages as and when needed.

Rendering pages and posts

As already mentioned, all WordPress pages are rendered and executed using the code you have written in the page.php file, except pages with custom page template. The below code is an example that will show a page featuring the page title, description and featured image.

&lt;?php
get_header();
?&gt;
&lt;div id="primary" class="content-area"&gt;
&lt;main id="main" class="site-main"&gt;
&lt;?php
while ( have_posts() ) :
the_post();
?&gt;
&lt;?php
if ( has_post_thumbnail() ) :
the_post_thumbnail();
endif;
?&gt;
&lt;header class="entry-header"&gt;
&lt;?php the_title(); ?&gt;
&lt;/header&gt;
&lt;div class="entry-content"&gt;
&lt;?php the_content(); ?&gt;
&lt;/div&gt;
&lt;?php
endwhile;
?&gt;
&lt;/main&gt;
&lt;/div&gt;
&lt;?php
get_footer();

Similar code will go inside the single.php file to display the post information. To render the post listing properly (your index.php), in addition to the above methods – you may also want to use the following:

  • the_catgeory() : Displays category list for a post.
  • the_permalink() : Displays the permalink for the current post.
  • the_excerpt() : Display the post excerpt.

I18n for WordPress custom themes

While building a custom theme, try to remember that it should be developed in a way to support internationalization. By doing this, it makes it possible for your theme to easily be translated into other languages.

To add I18n support, remember to use a text domain which you can parse source files and extract the translatable strings from. In this example, we are using the text domain ‘Updraft’, but you can choose any unique identifier. We can define the text domain as follows. 

function i18n_setup() {
load_theme_textdomain( 'updraft', get_stylesheet_directory() . '/languages' );
}
add_action( 'after_setup_theme', 'i18n_setup' );

Now whenever you use static strings in your theme files, wrap them inside __() or _e() functions.

&lt;h2&gt;&lt;?php _e('First Name', 'updraft); ?&gt;&lt;/h2&gt;
&lt;?php echo __('User Email', 'updraft'); ?&gt;

There are special tools available like POEDIT that help to generate translated language files. Please refer to this blog for more information.

This blog has covered the basics on creating WordPress custom themes. However, it is a vast topic that requires a lot of time and patience. Below are some helpful resources you should get acquainted with that will help you start to create your WordPress themes..

When create a new theme for your WordPress site, remember that you will need to back it up after every change or risk losing all your work. Use UpdraftPlus – The world’s leading and most trusted WordPress backup, restore and clone plugin.

The post How to create a WordPress custom theme appeared first on UpdraftPlus. UpdraftPlus – Backup, restore and migration plugin for WordPress.

UpdraftPlus Vs BackupBuddy: WordPress backup plugins compared


BackupBuddy Vs UpdraftPlus – Which Is Better?

One of the biggest risks you face when setting up your own WordPress website is when your site inevitably encounters a problem such as hacks, plugin issues, a bad update, malware or compatibility problems. After all the time and money you spent building and launching your site, it’s possible that you could lose everything in a blink of an eye. It’s all too easy not to even think of these problems, until it actually happens. This is why having a WordPress backup plugin is so important. With the right backup plugin, you can restore your website to it’s working state with a click of a button. In a crowded marketplace with so many options, it can sometimes be difficult to evaluate which plugin is the best for you. In this blog and video we will look at and review two of the most popular backup plugins – UpdraftPlus and BackupBuddy – evaluate the strengths and weaknesses of both, and assess the benefits of Premium versions.

Free plugin versions

The free version of the UpdraftPlus plugin is used on over 3 million WordPress sites all over the world and is the highest rated backup plugin on WP.org. The free version can quickly backup and restore your site and comes with enough features and tools to satisfy most users. This plugin can also easily be downloaded directly in your WordPress site plugin settings, allowing you to start backing up straight away.

BackUpBuddy does not currently offer a free version of it’s backup plugin. As such, it is not possible to compare the free versions of both plugins at this time.

What to look for in a backup plugin

When deciding which backup plugin is best to backup your WordPress site, there are several criteria you should look at, including options that will allow you to backup all your files, database, plugins, themes, uploads and any other directories found, as well as most importantly allowing you to easily restore your site should the worst happen. 

When backing up your site, it is important to choose the right remote storage location. With UpdraftPlus Premium, you have 10 well known remote storage options such as Amazon S3, Google Cloud and Dropbox, as well as 6 additional backup location options including email and FTP.

BackupBuddy’s options are limited to 5 of the well known remote storage options, with 3 additional backup locations. 

Tutorial guides

The plugin itself isn’t the only factor you should consider when making your decision. Setting up and using all the different features in these plugins can sometimes be tricky and confusing, especially for those who may not be IT experts. UpdraftPlus has dozens of up to date video guides on YouTube that can show you everything from how to update from the free version, to the Premium version, to how to connect your UpdraftPlus account to the remote storage provider of your choice.

BackupBuddy’s list of video guides is somewhat limited in comparison, with minimal instructions and only a few (if any) guides on how to connect BackupBuddy to a remote storage location.

Scheduling

Making regular scheduled backups of your WordPress site is essential, as you always want to have the latest version on your site on hand should the worst happen. Both plugins offer scheduling backup options ranging from automatically backing up every hour or so, to every year. With UpdraftPlus however, you can select how many copies of your backup you want to keep within the same page on your site.

While this option is also available in BackupBuddy, it is hidden away in a sub-menu – making it difficult to find.

UpdraftPlus or BackupBuddy?

So which backup plugin should you choose? UpdraftPlus is the world’s most trusted and popular plugin that is trusted by over 3 million users worldwide. With this level of trust, support and development, as well as the ability to backup and restore your site quickly and easily, UpdraftPlus gives you everything you need to backup and restore your site with just a press of a button. 


The post UpdraftPlus Vs BackupBuddy: WordPress backup plugins compared appeared first on UpdraftPlus. UpdraftPlus – Backup, restore and migration plugin for WordPress.