How to create a WordPress custom theme

WordPress occupies a huge percentage of the world’s websites, making up 37% of all sites currently online. While there are many reasons and factors for this success, one of the main reasons is the popularity of features available to all users. Plugins, themes, posts, pages, categories, taxonomies, user roles and media handling just to name a few. To get the most out of WordPress, it is recommended users study and learn how to use all of these features. In this blog, we will focus on and discuss WordPress Themes and will walk you through the basics required on how to create a WordPress custom theme.

What is a custom theme?

Everything on the frontend of your site is being run from and controlled using something called a ‘theme’. A website’s theme is responsible for the specific design and functionality of the website. You can check out the WordPress theme repository or Themeforest for theme examples; here you will find thousands of themes listed for you to explore and download.

While established WordPress themes are great, if you have the ability and need, you may also want to build your own custom theme for a client, for yourself, or to submit to the marketplaces with the intention of selling it. When creating a commercial theme, you will need to follow the marketplaces guidelines for coding standards, structure of files and folders, etc. You can find more details regarding these guidelines on the marketplaces websites

In this blog, we will run through a tutorial to show you a basic overview on how to create your very own WordPress theme by covering all the basics and steps associated with the process. 

Create a WordPress custom theme

WordPress themes are built with template files, scripts, styles, images, etc. To proceed, you should have working knowledge of PHP, HTML and CSS, which are required to build a custom theme. Understanding JavaScript can also be an additional advantage.

To get started, we will first name the theme ‘Updraft’. Create a folder called ‘Updraft’ inside wp-content/themes. Within this ‘Updraft’ folder, you will write your theme related code, store files, images, fonts, etc. 

The main files of the custom WordPress theme are:

  • style.css
  • index.php
  • functions.php

The style.css will be the main stylesheet file and you can add all of your CSS in this file. Remember that you must include an information header about the theme. The header should look similar to the below format and be on the top of style.css.

</em></strong>
<strong><em>/*</em></strong>
<strong><em>Theme Name: Updraft</em></strong>
<strong><em>Theme URI: https://updraftplus.com</em></strong>
<strong><em>Author: UpdraftPlus</em></strong>
<strong><em>Author URI: https://updraftplus.com</em></strong>
<strong><em>Description: The custom theme built for the website.</em></strong>
<strong><em>Version: 1.0</em></strong>
<strong><em>License: GNU General Public License v2 or later</em></strong>
<strong><em>License URI: http://www.gnu.org/licenses/gpl-2.0.html</em></strong>
<strong><em>Text Domain: updraft</em></strong>
<strong><em>*/</em></strong>
<strong><em>

Next, go to the Appearance >>Themes, where you will see your theme listed. Activate it. When you check the frontend of your site, it will show a blank screen – as we have not added anything to the theme yet..

Remember to store your images, scripts and styles into your theme directory. The theme directory refers to the ‘wp-content/themes/Updraft’ folder. Be sure to keep them organized by using a good folder structure, creating specific folders for images, scripts and styles; Copy the files into the respective directory.

Functions File

The functions.php is the file where you can add code for different purposes. This file is automatically loaded during WordPress initialization, with the code written in it executed automatically.

The following operations in the functions.php file are usually carried out in this order:

  • Enqueue theme stylesheets and scripts (add the JS and CSS files to the website).
  • Enable Sidebars, Navigation Menus, Post Thumbnails, etc.
  • Define functions used throughout the application.
  • Etc.

The user can add their styles and scripts from functions.php file as follows. Please see the following link for more documentation.

function include_js_css() {
wp_register_style( "bootstrap", get_stylesheet_directory_uri() . </em></strong>
<strong><em>"/styles/bootstrap.min.css", array(), false, "all" );
wp_enqueue_style( "bootstrap" );
wp_register_script('bootstrap', get_stylesheet_directory_uri() . </em></strong>
<strong><em>'/scripts/bootstrap.min.js', array(), false, true);
wp_enqueue_script('bootstrap');
}
add_action('wp_enqueue_scripts', 'include_js_css');

The get_stylesheet_directory_uri() function gives a relative path of the active theme directory. The rest of the code can be seen to be the path of the assets.

Similarly, for adding Navigation Menus, Post Thumbnails:

function updraft_theme_setup() {</em></strong>
<strong><em>add_theme_support( 'post-thumbnails' );
register_nav_menus(
array(
'primary' =&gt; __( 'Primary Menu' ),
'footer1='  =&gt; __( 'Footer Menu' ),
'shop'  =&gt; __( 'Shop Page Menu' ),
)
);
}
add_action( 'after_setup_theme', 'updraft_theme_setup' );

Next, go to the WordPress dashboard and add a post or page. You should see the ‘Featured Image’ section. Additionally, under the Appearance >> Menus, you will find the Primary Menu and Footer Menu under Manage Locations.

These are just a few of the basic features you can cover while using the ‘Function’ file. There are a lot more you can add in this file if you so wished.

Template files

When building your theme, template files can be used to affect the layout and design of different parts of your website. For example, you would use the header.php template to create a header, or the comments.php template to include comments on your site. Template files have a .php extension. As they are PHP files, all pages output as HTML.

Using templates, developers can distribute code among multiple files. Listed below are some of the files in question.

  • index.php : The main template. This file should be responsible for post listing. When you set the Posts page from Settings >> Readings, this template gets executed.
  • page.php : This template is responsible for rendering your pages. This setting can be overridden by assigning a custom page template to individual pages.
  • single.php : Used when a single post is queried.
  • header.php : Add your header part in this template.
  • footer.php : Add your footer part in this template.
  • sidebar.php : Add widgets in this template.

Get a list of all template files available here.

Custom page templates

By default, all your pages are rendered through the page.php template. But in practice, you sometimes have to display separate flows on different pages. In this scenario, it is recommended that you use the power of custom page templates.

For example, if you have a ‘Career’ page and you want to add your code to this page; to achieve this you would need to create a career.php file into the theme directory and place the comment below at the top of the file.

&lt;?php</em></strong>
<strong><em>/*</em></strong>
<strong><em>Template Name: Career</em></strong>
<strong><em>*/

Next, go to the page edit section and assign this ‘Career’ template from under the Page Attributes box.

Now when you visit the Career page – code from the career.php will be executed.

Header file

Your website will have a common header on all pages. You can place this common header into the header.php. The header code will be something like this:

&lt;!DOCTYPE html&gt;</strong></em>
<em><strong>&lt;html &lt;?php language_attributes(); ?&gt;&gt;</strong></em>
<em><strong>&lt;head&gt;</strong></em>
<em><strong>&lt;meta charset="&lt;?php bloginfo('charset'); ?&gt;"&gt;
&lt;meta name="viewport" content="width=device-width, initial-scale=1.0" /&gt;
&lt;?php wp_head(); ?&gt;
&lt;/head&gt;
&lt;body &lt;?php body_class(); ?&gt;&gt;
&lt;?php wp_body_open(); ?&gt;
&lt;!-- your menu --&gt;

In the above code, you will notice that we used some functions available in WordPress.

  • wp_head() : This method inserts crucial elements into your document – e.g., scripts, styles and meta tags.
  • body_class() : This will add different classes to the body element.
  • wp_body_open() : Used to insert code immediately after opening the body tag. An example of this would be the- Google Analytics script.

Menus can be added dynamically through the wp_nav_menu() function. Assuming you have first already created a menu under Appearance >> Menus and assigned ‘primary’ location to it. The code below generates the menu elements dynamically.

&lt;?php</strong></em>
<em><strong>wp_nav_menu(
array(
'theme_location' =&gt; 'primary',
'container_class' =&gt; 'menus',
)
);
?&gt;

Once your header file is set, use the get_header() function to include this file into your other templates.

Footer file

Similar to the header file, your common code for the footer will go inside the footer.php template.

&lt;!-- footer elements --&gt;
&lt;?php wp_footer(); ?&gt;
&lt;/body&gt;
&lt;/html&gt;

Here, use the wp_footer() that inserts elements, specifically scripts, at this location. Using get_footer() will include the contents of this file in other places.

Sidebar file

The sidebar is a vertical column used to display information on your site that is not shown within the main content. It may include popular articles, advertisement banners, a newsletter submission form, etc. Sidebars contain widgets that an administrator can customize. The sidebar.php template will include your site widgets.

In this example, we will create a basic sidebar by adding the below code to the functions.php file.

function updraft_widgets_init() {
register_sidebar(
array(
'name'          =&gt; esc_html__( Home Sidebar' ),
'id'            =&gt; 'sidebar-1',
'description'   =&gt; esc_html__( 'Add widgets here to appear in your sidebar.' ),
'before_widget' =&gt; '&lt;section id="widget" class="widget"&gt;',
'after_widget'  =&gt; '&lt;/section&gt;',
'before_title'  =&gt; '&lt;h2 class="widget-title"&gt;',
'after_title'   =&gt; '&lt;/h2&gt;',
)
);
}
add_action( 'widgets_init', 'updraft_widgets_init' );

Next, go to the Appearance >> Widgets. Here you will find the above sidebar. In this example, we are going to add some widgets to this sidebar. To add this sidebar to the frontend, add the following code in sidebar.php.

&lt;div class="sidebar"&gt;
&lt;?php
if ( is_active_sidebar( 'sidebar-1' ) ) {
dynamic_sidebar( 'sidebar-1' );
}
?&gt;
&lt;/div&gt;

Finally, remember to name the method ‘get_sidebar()’ so you can easily include the sidebar wherever on any other pages as and when needed.

Rendering pages and posts

As already mentioned, all WordPress pages are rendered and executed using the code you have written in the page.php file, except pages with custom page template. The below code is an example that will show a page featuring the page title, description and featured image.

&lt;?php
get_header();
?&gt;
&lt;div id="primary" class="content-area"&gt;
&lt;main id="main" class="site-main"&gt;
&lt;?php
while ( have_posts() ) :
the_post();
?&gt;
&lt;?php
if ( has_post_thumbnail() ) :
the_post_thumbnail();
endif;
?&gt;
&lt;header class="entry-header"&gt;
&lt;?php the_title(); ?&gt;
&lt;/header&gt;
&lt;div class="entry-content"&gt;
&lt;?php the_content(); ?&gt;
&lt;/div&gt;
&lt;?php
endwhile;
?&gt;
&lt;/main&gt;
&lt;/div&gt;
&lt;?php
get_footer();

Similar code will go inside the single.php file to display the post information. To render the post listing properly (your index.php), in addition to the above methods – you may also want to use the following:

  • the_catgeory() : Displays category list for a post.
  • the_permalink() : Displays the permalink for the current post.
  • the_excerpt() : Display the post excerpt.

I18n for WordPress custom themes

While building a custom theme, try to remember that it should be developed in a way to support internationalization. By doing this, it makes it possible for your theme to easily be translated into other languages.

To add I18n support, remember to use a text domain which you can parse source files and extract the translatable strings from. In this example, we are using the text domain ‘Updraft’, but you can choose any unique identifier. We can define the text domain as follows. 

function i18n_setup() {
load_theme_textdomain( 'updraft', get_stylesheet_directory() . '/languages' );
}
add_action( 'after_setup_theme', 'i18n_setup' );

Now whenever you use static strings in your theme files, wrap them inside __() or _e() functions.

&lt;h2&gt;&lt;?php _e('First Name', 'updraft); ?&gt;&lt;/h2&gt;
&lt;?php echo __('User Email', 'updraft'); ?&gt;

There are special tools available like POEDIT that help to generate translated language files. Please refer to this blog for more information.

This blog has covered the basics on creating WordPress custom themes. However, it is a vast topic that requires a lot of time and patience. Below are some helpful resources you should get acquainted with that will help you start to create your WordPress themes..

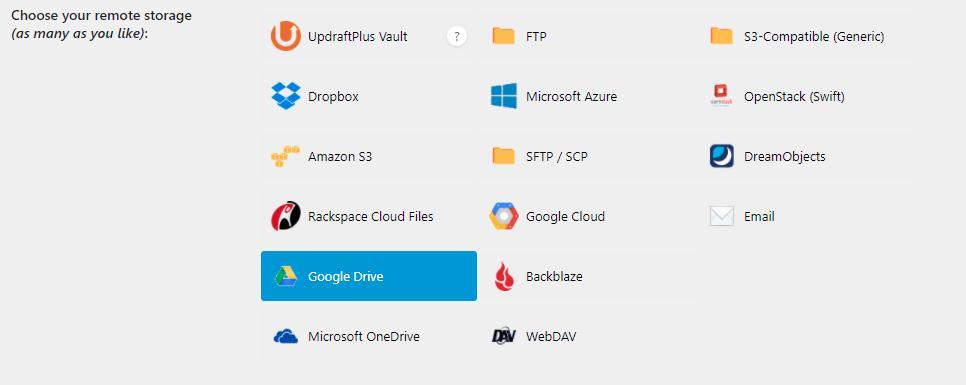
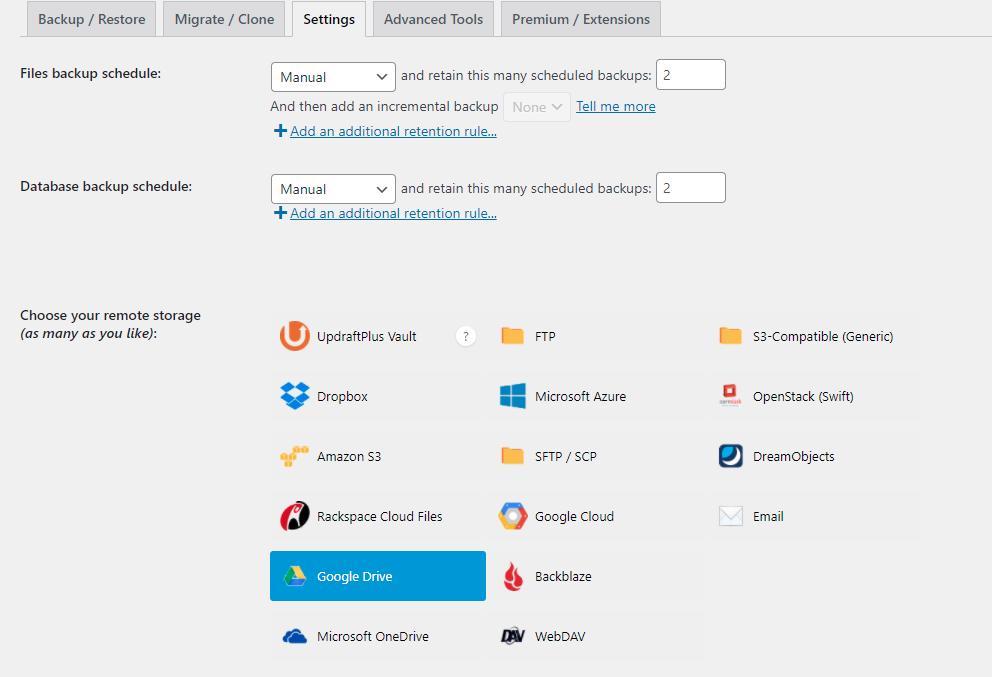
When create a new theme for your WordPress site, remember that you will need to back it up after every change or risk losing all your work. Use UpdraftPlus – The world’s leading and most trusted WordPress backup, restore and clone plugin.

The post How to create a WordPress custom theme appeared first on UpdraftPlus. UpdraftPlus – Backup, restore and migration plugin for WordPress.

UpdraftPlus Vs BackupBuddy: WordPress backup plugins compared


BackupBuddy Vs UpdraftPlus – Which Is Better?

One of the biggest risks you face when setting up your own WordPress website is when your site inevitably encounters a problem such as hacks, plugin issues, a bad update, malware or compatibility problems. After all the time and money you spent building and launching your site, it’s possible that you could lose everything in a blink of an eye. It’s all too easy not to even think of these problems, until it actually happens. This is why having a WordPress backup plugin is so important. With the right backup plugin, you can restore your website to it’s working state with a click of a button. In a crowded marketplace with so many options, it can sometimes be difficult to evaluate which plugin is the best for you. In this blog and video we will look at and review two of the most popular backup plugins – UpdraftPlus and BackupBuddy – evaluate the strengths and weaknesses of both, and assess the benefits of Premium versions.

Free plugin versions

The free version of the UpdraftPlus plugin is used on over 3 million WordPress sites all over the world and is the highest rated backup plugin on WP.org. The free version can quickly backup and restore your site and comes with enough features and tools to satisfy most users. This plugin can also easily be downloaded directly in your WordPress site plugin settings, allowing you to start backing up straight away.

BackUpBuddy does not currently offer a free version of it’s backup plugin. As such, it is not possible to compare the free versions of both plugins at this time.

What to look for in a backup plugin

When deciding which backup plugin is best to backup your WordPress site, there are several criteria you should look at, including options that will allow you to backup all your files, database, plugins, themes, uploads and any other directories found, as well as most importantly allowing you to easily restore your site should the worst happen. 

When backing up your site, it is important to choose the right remote storage location. With UpdraftPlus Premium, you have 10 well known remote storage options such as Amazon S3, Google Cloud and Dropbox, as well as 6 additional backup location options including email and FTP.

BackupBuddy’s options are limited to 5 of the well known remote storage options, with 3 additional backup locations. 

Tutorial guides

The plugin itself isn’t the only factor you should consider when making your decision. Setting up and using all the different features in these plugins can sometimes be tricky and confusing, especially for those who may not be IT experts. UpdraftPlus has dozens of up to date video guides on YouTube that can show you everything from how to update from the free version, to the Premium version, to how to connect your UpdraftPlus account to the remote storage provider of your choice.

BackupBuddy’s list of video guides is somewhat limited in comparison, with minimal instructions and only a few (if any) guides on how to connect BackupBuddy to a remote storage location.

Scheduling

Making regular scheduled backups of your WordPress site is essential, as you always want to have the latest version on your site on hand should the worst happen. Both plugins offer scheduling backup options ranging from automatically backing up every hour or so, to every year. With UpdraftPlus however, you can select how many copies of your backup you want to keep within the same page on your site.

While this option is also available in BackupBuddy, it is hidden away in a sub-menu – making it difficult to find.

UpdraftPlus or BackupBuddy?

So which backup plugin should you choose? UpdraftPlus is the world’s most trusted and popular plugin that is trusted by over 3 million users worldwide. With this level of trust, support and development, as well as the ability to backup and restore your site quickly and easily, UpdraftPlus gives you everything you need to backup and restore your site with just a press of a button. 


The post UpdraftPlus Vs BackupBuddy: WordPress backup plugins compared appeared first on UpdraftPlus. UpdraftPlus – Backup, restore and migration plugin for WordPress.

How to set up additional retention rules for your UpdraftPlus backup

In this blog, we will show you how to add additional retention rules when backing up your WordPress sites with UpdraftPlus. 

By adding additional retention rules, all backups that are older than a certain date will be grouped together and pruned until there is only one backup for each time period. The additional retention rules run after the normal backup pruning, and are run in the order they were created. Additional retention rules also include automatic backups when evaluating which backups to prune.

First, you will need to install and activate UpdraftPlus Premium or the ‘Backup time and scheduling‘ add-on, via the Premium/Extensions tab. Full instructions on how to do so can be found in our installation guide.

To set it up, first go to: WP Admin->Settings->UpdraftPlus Backups->Settings tab

Under the Files/Database backup schedule settings, find the ‘Add an additional retention rule’ link

Set your additional retention rule/s and press the ‘Save Changes’ button at the bottom of the page.

Set how old the backups to be considered should be and how many backups to keep. Once this is setup, all backups older than your selected time period will be grouped together and pruned, until there is only one backup for each time period.


The post How to set up additional retention rules for your UpdraftPlus backup appeared first on UpdraftPlus. UpdraftPlus – Backup, restore and migration plugin for WordPress.

The risks and pitfalls of WordPress auto-updates

When a new version of WordPress launched in August of 2020, something else came with it: a brand-spanking-new updates feature, along with the risks and pitfalls of WordPress auto-updates. This marked a step-up from previous WordPress releases, in which plugins and themes could only be manually updated. When version 5.5 was released, WordPress users were able to enable auto-updates for any plugin or theme on their site. 

Sounds great, right? In many ways it was. But here’s the catch. Auto-updates aren’t always the best thing since sliced bread and are in fact known to cause a whole load of problems ranging from mildly inconvenient formatting issues, to the downright catastrophic total site failures. If you’ve been thinking about enabling auto-updates for your website, you’ve come to the right place. In this blog, we’ll be running you through some common risks and pitfalls and how to avoid them.

What is an auto-update?

Auto-updates are updates to plugins and themes that take place automatically without the site owner having to do anything manually via WordPress. Unlike manual updates, there’s no need to initiate the process or download new versions of your existing plugins and themes. In WordPress 5.5, site owners can choose whether or not to use the auto-update feature. Each plugin and theme has its own ON/OFF option specifically for auto-updates. 

What are the risks?

Whatever kind of business you’re running – be it a small eCommerce store or a SaaS digital marketing agency, before enabling auto-updates on your WordPress site, it’s important to be aware of all the ‘side-effects’ – both good and bad. Auto-updates are convenient, but there can be some big drawbacks. 

Updates can cause technical issues

Updates have been known to sometimes cause problems on your website. This is more likely if you opt for comprehensive auto-updates across all plugins and themes. Updates will run in the background and you won’t even be aware of it most of the time. But sometimes updates cause technical issues or even ‘breaks’. Auto-updates can fail, especially when concurrent updates are happening simultaneously – with site functionality (e.g. mobile optimization) more likely to go askew. 

Updates can be hard to keep track of

If an update does mess up your site, you will need to know what caused it. Determining exactly what happened and when can be tricky. Especially if multiple updates all took place simultaneously. With selected automatic and manual updates, it can be easier to isolate the root issue and fix it. 

Some major releases may be incompatible

Sometimes auto-updates might include a major release. If a particular plugin (e.g. a plugin used to monitor cloud metrics) releases an update with a larger than normal installation base, it could cause problems. If you have auto-update enabled, you won’t have any control over whether or not you wish to deploy those changes. 

WordPress does not use a ‘Canary update’ testing process. Canary updates roll out code to test sites before official release. Without this, there’s no telling what a new update will do. Likewise with smaller plugins, top-notch quality assurance is not guaranteed. By enabling auto-updates you’re essentially handing over control to unknown quality assurance teams. 

The best way to run WordPress updates

There are safer ways to enjoy the benefits that automatic updates bring. Just proceed with caution. Now that you’re aware of some of those common issues, you can enjoy auto-updates without worrying too much about the consequences. 

With all the potential issues your site can be faced when updating your plugins and theme, it is vitally important to have a secure and recent backup of your site. Having a backup with UpdraftPlus can help save you. Even if you take all the necessary precautions, it is still possible to fall victim to a bad update and have your site die on you. Backing up your site with UpdraftPlus can be done in just a few minutes. Just download UpdraftPlus, follow these simple instructions and you won’t have to worry about an update permanently taking down your site again. 

While the latest update of WordPress can update your plugins automatically, we recommend that you turn off auto-updates for all/selected plugins and use Easy Updates Manager instead. Easy Updates Manager currently helps more than 300,000 WordPress users automatically keep their sites up to date and bug-free. It’s also highly customizable to give you real control over what updates to run.

Easy Updates Manager in action

Choose from manually update, disable update, enable auto updates, disable auto updates and choose per plugin/theme, so you always have full control over your site and what aspects are updated. This offers a greater degree of control and limits unnecessary risk or disruption – disruption that could potentially derail a business in its infancy. 

The potential business impact of an auto-update-related disruption could be catastrophic. If an automatic update interferes with your customer payment portal for example, the losses could be substantial for a well-established brand with high volume sales. 

Use UpdraftPlus and Easy Updates Manager today for the best backup and auto update options. 

Marjorie Hajim

The post The risks and pitfalls of WordPress auto-updates appeared first on UpdraftPlus. UpdraftPlus – Backup, restore and migration plugin for WordPress.

7 critical measures for protecting your WordPress admin area

Content management system platforms like WordPress have successfully democratized website building in the current digital era, with what used to be a potentially expensive and tedious and difficult process, now becoming easier and more accessible for both inexperienced and experienced site owners. But how do you go about protecting your WordPress admin area?

However, the issues of security have remained challenging for many WordPress site owners. According to a report by WordPress security plugin WordFence, almost 90,000 security issues were reported every 60 seconds on WordPress websites in 2020.

This data is even more troubling when we take into account login-based WordPress sites like eCommerce platforms, where sensitive information such as banking and debit card details are shared daily.

If you’re trying to build a website, using WordPress is a great idea, but you may be worried about the security of your WordPress admin area, especially given the sheer volume of cyber threats in the previous year. 

If you wish to reinforce your log-in mechanics, consider these seven simple measures to secure your admin area.

1. Change your passwords often

Let’s start with the basics of WordPress admin and login security. It may seem like the simplest solution when it comes to your site’s security, but changing passwords is often overlooked as an effective security measure.

This cybersecurity approach is essential to any login-based online service and should be implemented across all types of sites, from streaming platforms like Netflix, to social media sites like Instagram, to online group meeting apps like RingCentral. When it comes to preventing admin-related issues, changing a password regularly is a popular cybersecurity tactic. 

2. Keep your plugins updated

Let’s go back to that WordFence data we mentioned earlier. In one study conducted by WordFence researchers, it was found that over half of WordPress cybersecurity issues (52%) were caused by plugins. 

As such, he first step toward securing your WordPress site is investing in WordPress security plugins. Many of these track and record login attempts to analyze any possible admin area threats.

Additionally, it’s important to get rid of outdated WordPress plugins. These pose a threat to your site’s security since they stop updating, meaning their security measures end up being lacking. The safest course of action is to uninstall them, as disabling doesn’t get rid of the additional (and weak) code. Use UpdraftCentral to efficiently manage, update and backup multiple website plugins, themes and backups from one place for sites on which UpdraftPlus is installed.

3. Implement SSL login pages

SSL stands for “secure sockets layer”. This security protocol is generally used on websites that store sensitive data, especially those that require authentication to log in. In essence, SSL measures activate a digital lock – technically, an HTTPS protocol – that guarantees a secure connection from the server to the browser.

Usually your run-of-the-mill hosting provider will include these measures in your subscription. If they do not, consider purchasing an SSL certificate and installing it on your WordPress server. 

This is especially useful for eCommerce WordPress sites, which ask their clients to log in with a profile to automate the checkout process when paying via credit or debit card.

4. Limit login attempts

Restricting the number of possible login attempts is one reliable cybersecurity tip to protect data, especially if you’re looking to prevent potential brute force attacks. 

These cybersecurity breaches are achieved by bombarding an admin platform with every conceivable combination of characters to form passwords, using a simple but effective cracking method of trial and error. 

By limiting login attempts, you can protect your users and your page from attacks of this nature.

Limit login attempts WordPress security image

Image Source

However, when it comes to WordPress admin security issues, it’s important to note that not every hazardous log-in attempt comes from criminals looking to steal data. Sometimes, admin platforms are subjected to non-malicious intrusions performed by users.  

If you’re running a WordPress site that provides user registration, there’s a chance that your users – or yourself – will get locked out of their account by accident. Forgetting your password has happened to everyone at some point after all.

The best way to separate malware attacks and non-malicious intrusions is to implement a network intrusion detection system that can track, record, and analyze potential login or admin issues, without interfering with the traffic it monitors. This way, you can ensure you’re not punishing forgetful users, but are keeping them protected nonetheless.

5. Use two-factor authentication

Two-factor authentication is a security protocol that enforces an additional check on users looking to gain access to WordPress sites. This protection method adds an extra layer of security to passwords by asking for a unique one-use-only code that’s sent to your smartphone.

These apps and plugins are installed on your smart device and will send the codes so you can access your WordPress login screen. This approach is seen as a more secure way of changing your passwords regularly and is particularly recommended for eCommerce sites.

6. Implement IAM solutions

Identity and access management (IAM) software solutions are used to limit the number of remote users accessing online platforms via admin areas and login accounts. In the digital era, the IAM market has grown rapidly and the current list of IAM solutions available can overwhelm newcomers and inexperienced WordPress site owners alike.

There’s a basic list of points to follow to make the most of your IAM service, regardless of which IAM option you choose. Here’s a shortlist of what to do before you commit to a particular provider:

  • Access the IT architecture.
  • Look for any possible incompatibilities between the OS, third-party application or plugins, and the IAM tool.
  • Verify that your IAM system is compliant with guidelines and laws in your industry, market, and country.

Security WordPress image

Image Source

7. Have a backup

The sad truth is, some things are unavoidable. It may be difficult to read, but there’s a chance that even if you do everything right, hackers will still be able to gain access to and attack your admin area. If that happens, it’s important to have a plan of action ready.

Imagine the worst-case scenario: your site has been attacked and hacked. There are no more prevention measures to implement. 

First things first, remember not to panic. Work to identify the problem and react accordingly. The best way to know if you’ve fallen victim to a cybersecurity breach is to look for possible signs of a hacking attack: 

  • You’re unable to log in.
  • Your site is redirecting elsewhere.
  • Your content has disappeared or there is new strange content and links.
  • Your site is running slower than usual.

Once you’ve identified the problem, the fastest way to fix any possible issues is to restore your WordPress website using UpdraftPlus. This will allow you to undo any hazardous changes and get back to normal as quickly as possible. To do so, you must have an older version of your site as a backup somewhere secure – such as a cloud storage platform.

As you may be aware, having your data backed up is one of the most essential things to do in terms of cybersecurity. If you want to keep a record of past versions of your site separate from your site, cloud-storage solutions offer safe and secure backups that can help you relaunch your site in just minutes after an attack.

Summary

Now you have read seven effective security tips for your WordPress admin area, let’s reiterate what we’ve learned so far:

  • Change your passwords often.
  • Install login security plugins (and uninstall old or obsolete plugins).
  • Implement SSL encryption-based protocols.
  • Combat brute force attacks by limiting login attempts.
  • Use additional one-use-only passwords and codes by adding 2FA.
  • Limit your log-in possibilities with IAM software solutions.
  • Have a contingency plan to fight security breaches, malware, and ransomware viruses.
  • Keep a backup version of your site and use it during cybersecurity emergencies.

If you follow these measures, your WordPress site should be protected from any attacks and ready to combat and react to any issues, should the worst happen. 

What are you waiting for? Go out there and turn your WordPress page into an online fortress using UpdraftPlus and UpdraftCentral today!

John Allen has written for websites such as Hubspot and Toolbox.

The post 7 critical measures for protecting your WordPress admin area appeared first on UpdraftPlus. UpdraftPlus – Backup, restore and migration plugin for WordPress.

How to upgrade from Free UpdraftPlus to UpdraftPlus Premium

When upgrading from your Free version of UpdraftPlus to UpdraftPlus Premium, the process can be a little tricky if it is your first time. As UpdraftPlus Premium is not listed on WP.org, it isn’t as simple as just clicking an upgrade button. But if you follow this easy to use guide, upgrading from UpdraftPlus Free to UpdraftPlus Premium can be quick and easy. 

Step 1.

Assuming you have the free version of UpdraftPlus installed, you need to deactivate and delete the UpdraftPlus free plugin from your WordPress site.

Step 2.

You now need to install the UpdraftPlus Premium plugin. This can be downloaded by following this link. Save the file to your computer.

Step 3.

Next, go to your WordPress site and choose ‘Add New’ plugin. Select the ‘Upload Plugin’ button. Now select the UpdraftPlus Premium file you just downloaded (it can usually be found in the “Download” folder on your PC) and press ‘Open’ and activate.

Step 4.

Your UpdraftPlus Premium plugin should now be installed. Go to ‘Settings’ and you should now see ‘UpdraftPlus Backups’. 

Step 5.

You now need to connect your UpdraftPlus account to the Premium plugin. To do this, go to Premium/Extensions and log in using your UpdraftPlus.com account details and press ‘Connect’. 

Step 6.

You are now connected to UpdraftPlus Premium. To claim any add-ons you may have purchased (such as Azure remote storage backup), remember to press the ‘Activate it on this site’ button, which will allow you to use your purchased add-on feature with your WordPress site.  

Step 7.

Finally, refresh the connection by pressing the below link and you are good to go. All Premium features and add-ons should now be available.

Step 8.

Don’t forget to then go to the UpdraftPlus settings page to set your backup schedule and press the save button at the bottom of the screen!

Download UpdraftPlus Premium today. If you require further detailed instructions, more information can be found here. Be sure to comment and let us know if you have any questions.

The post How to upgrade from Free UpdraftPlus to UpdraftPlus Premium appeared first on UpdraftPlus. UpdraftPlus – Backup, restore and migration plugin for WordPress.